How to Install & Use Articulate Storyline on a Mac with Parallels
If you’re a Mac user like me, you may have quickly discovered that you can’t simply download and install Articulate Storyline on your Mac. And this is because Storyline is a Windows-only program.
However, not all is lost! I've been using and running Articulate Storyline on my Mac computers for the past 10+ years with Parallels. So, first, what the heck is Parallels?
Well, Parallels is a program that lets you create a "virtual machine" on your Mac, which lets you run Windows and then run Storyline. And while that might seem very technical and overwhelming, the good news is that Parallels does all the hard work for you!
So, in this article, I’ll walk you through step-by-step how to use Parallels to run Windows and use Articulate Storyline on a Mac.
Step One: Download & Install Parallels
The first step for running and installing Articulate Storyline on your Mac is to download and install Parallels. As I mentioned a moment ago, Parallels Desktop is a powerful program that lets you run Windows as a virtual machine on your computer.
While the Parallels website might seem a bit overwhelming and intimidating, getting up and running is pretty easy, especially since Parallels is going to do most of the work for you!
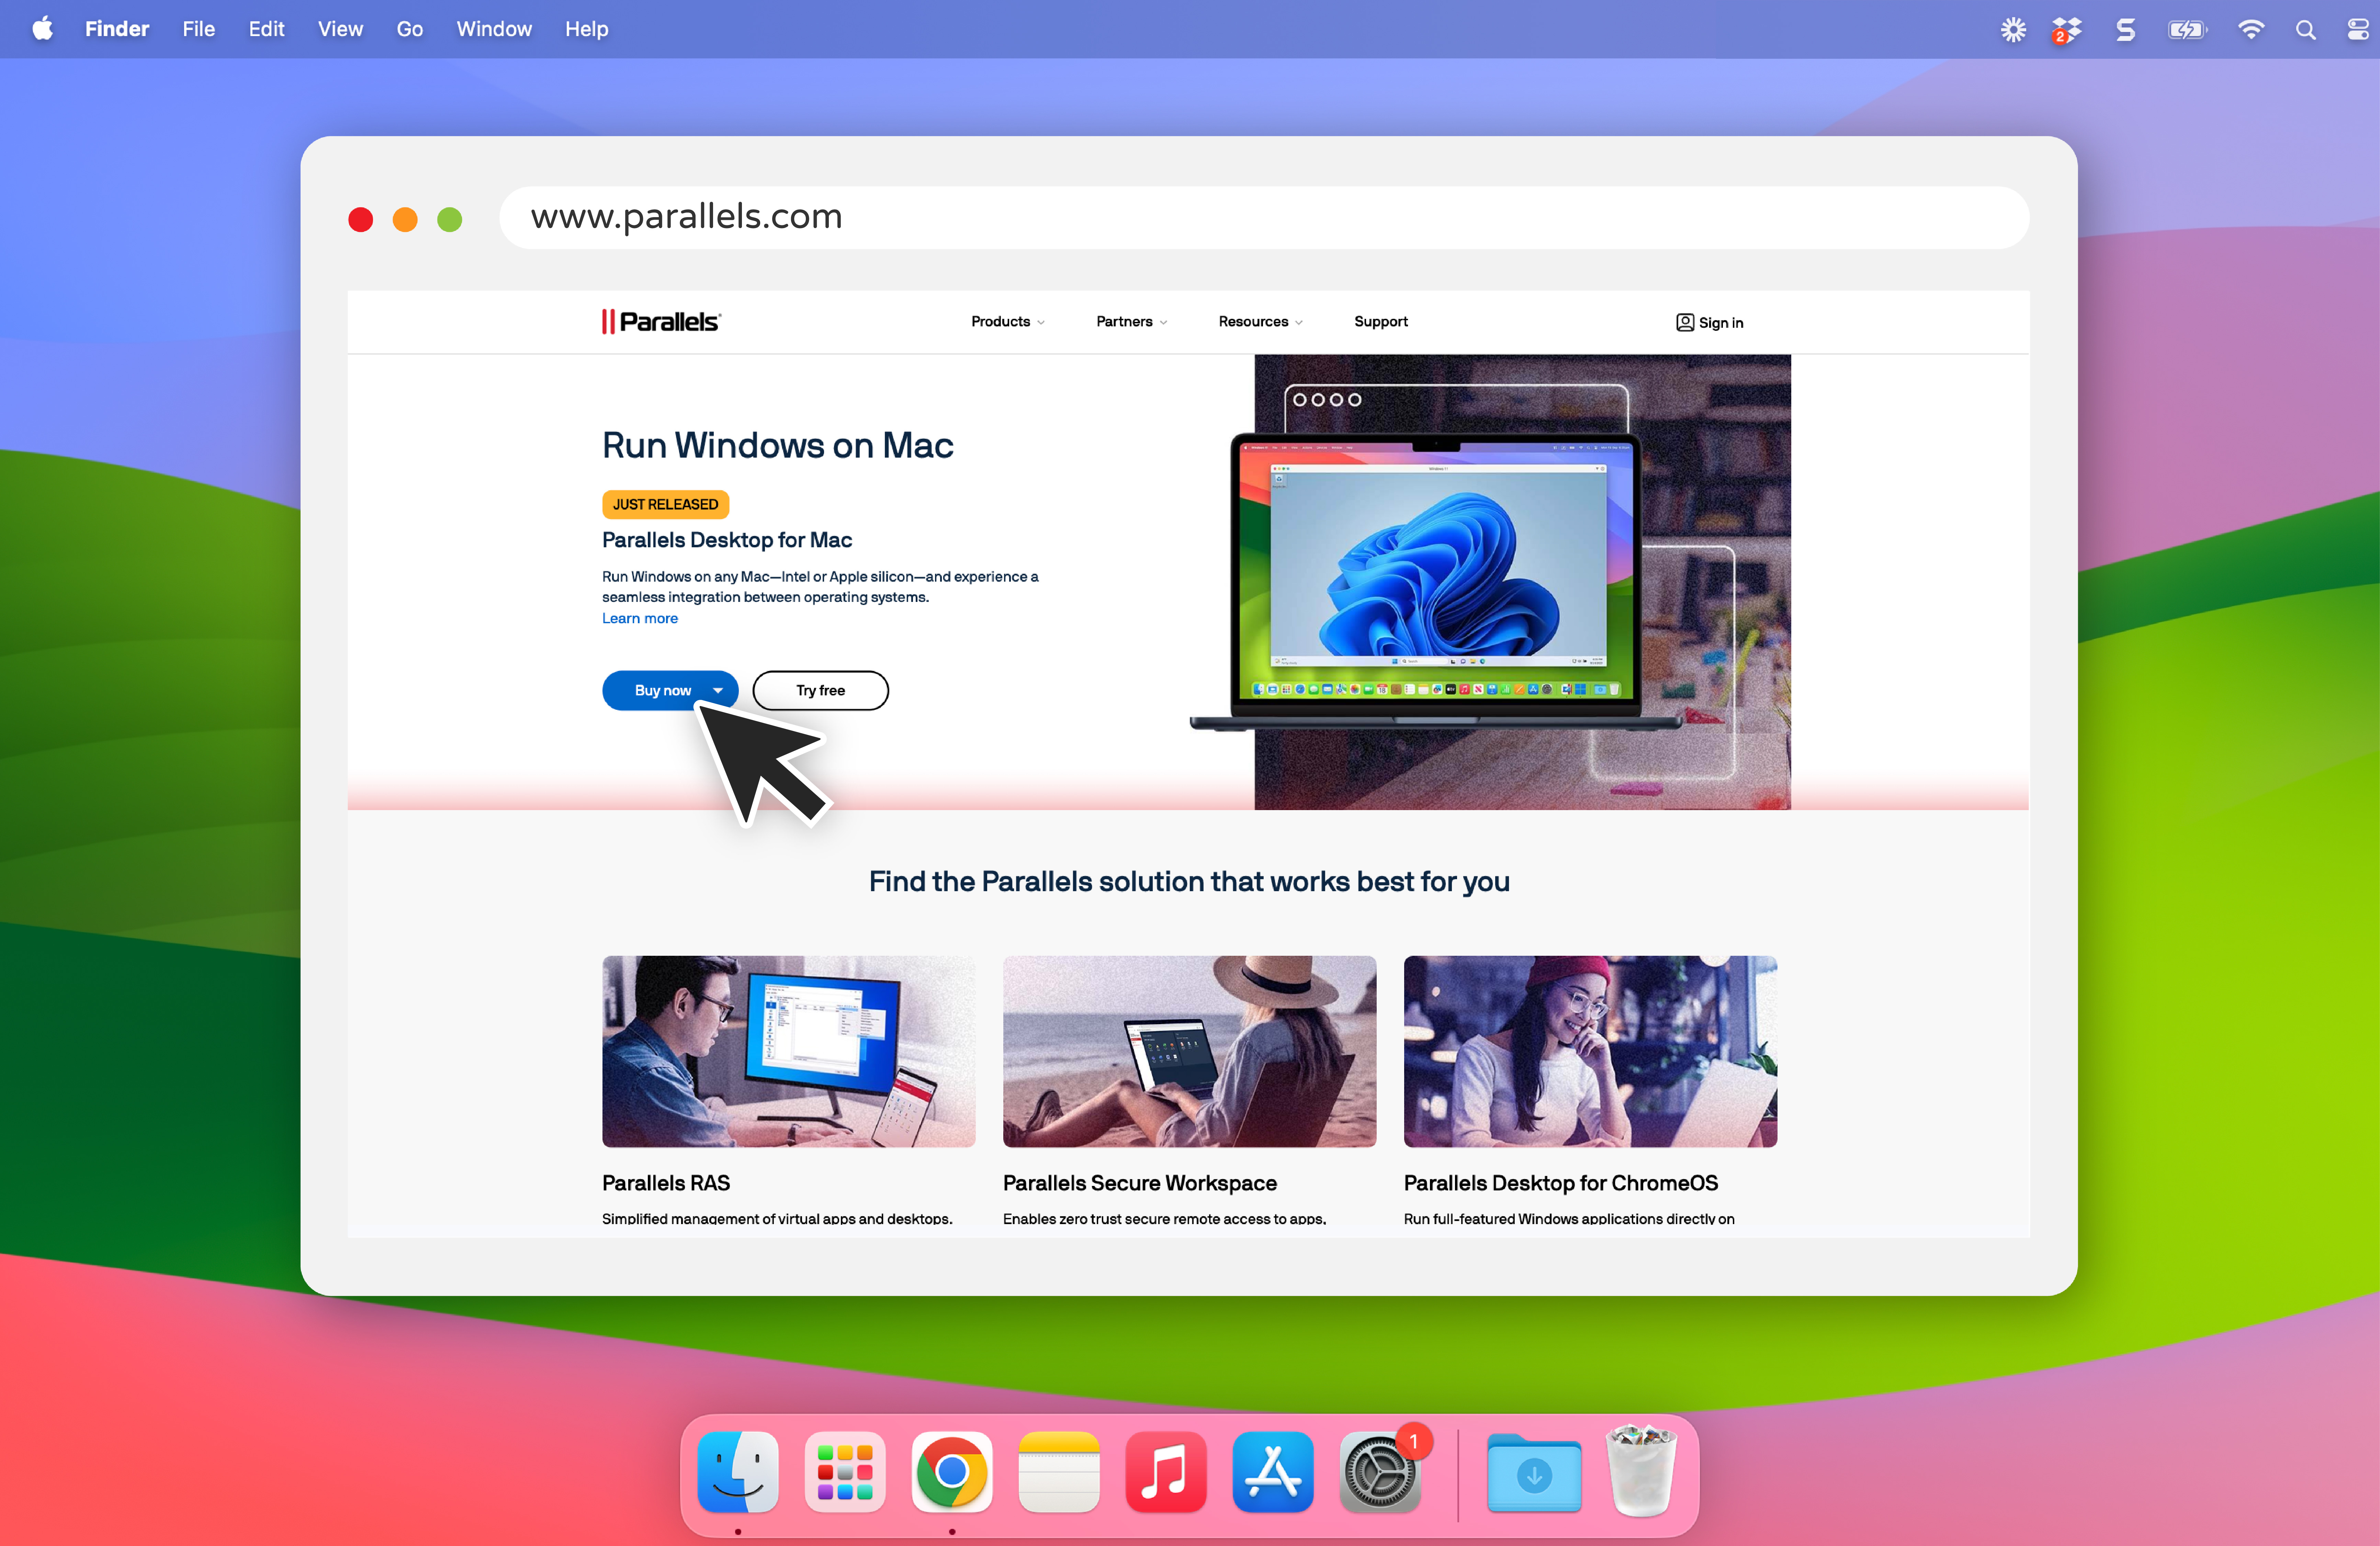
At this point, the most important decisions you need to make are whether or not your Mac is capable of running Parallels and Windows and which version of Parallels is right for you. The good news is as long you purchased your Mac within the last few years, you shouldn’t run into any major issues; however, it’s always good to compare your Mac specs with Parallel’s system requirements.
After you’ve confirmed that your Mac has the space and power to run Parallels and Windows, you’ll then want to pick the version that’s right for your needs and budget.
Parallels offers a number of different versions, each with unique features and pricing. Personally, I recommend going with the Individual Pro Edition, which is an annual subscription and allows you to dedicate more power from your Mac to running your virtual Windows computer. However, if you’d rather stick with a one-time purchase instead of an annual subscription, you can also pick the Individual Standard Edition.
After you’ve decided which version of Parallels is right for you, simply download and install it on your Mac—just like any other program!
Free Course: 10-Day Career Mindset Reset
Inside The eLearning Designer’s Academy, we think a little differently about professional development and career growth. Enroll in our free 10-Day Career Mindset Reset to start thinking differently about your skills, career, and confidence!
Step Two: Download & Install Windows
Okie dokie! After downloading and installing Parallels, the next step for using Storyline on your Mac is to download and install Windows—and this is where Parallels makes things incredibly easy! As you’re working through the installation process, Parallels will automatically download and install Windows for you—you don’t need to do anything extra. So, just keep following the steps of the installation process.
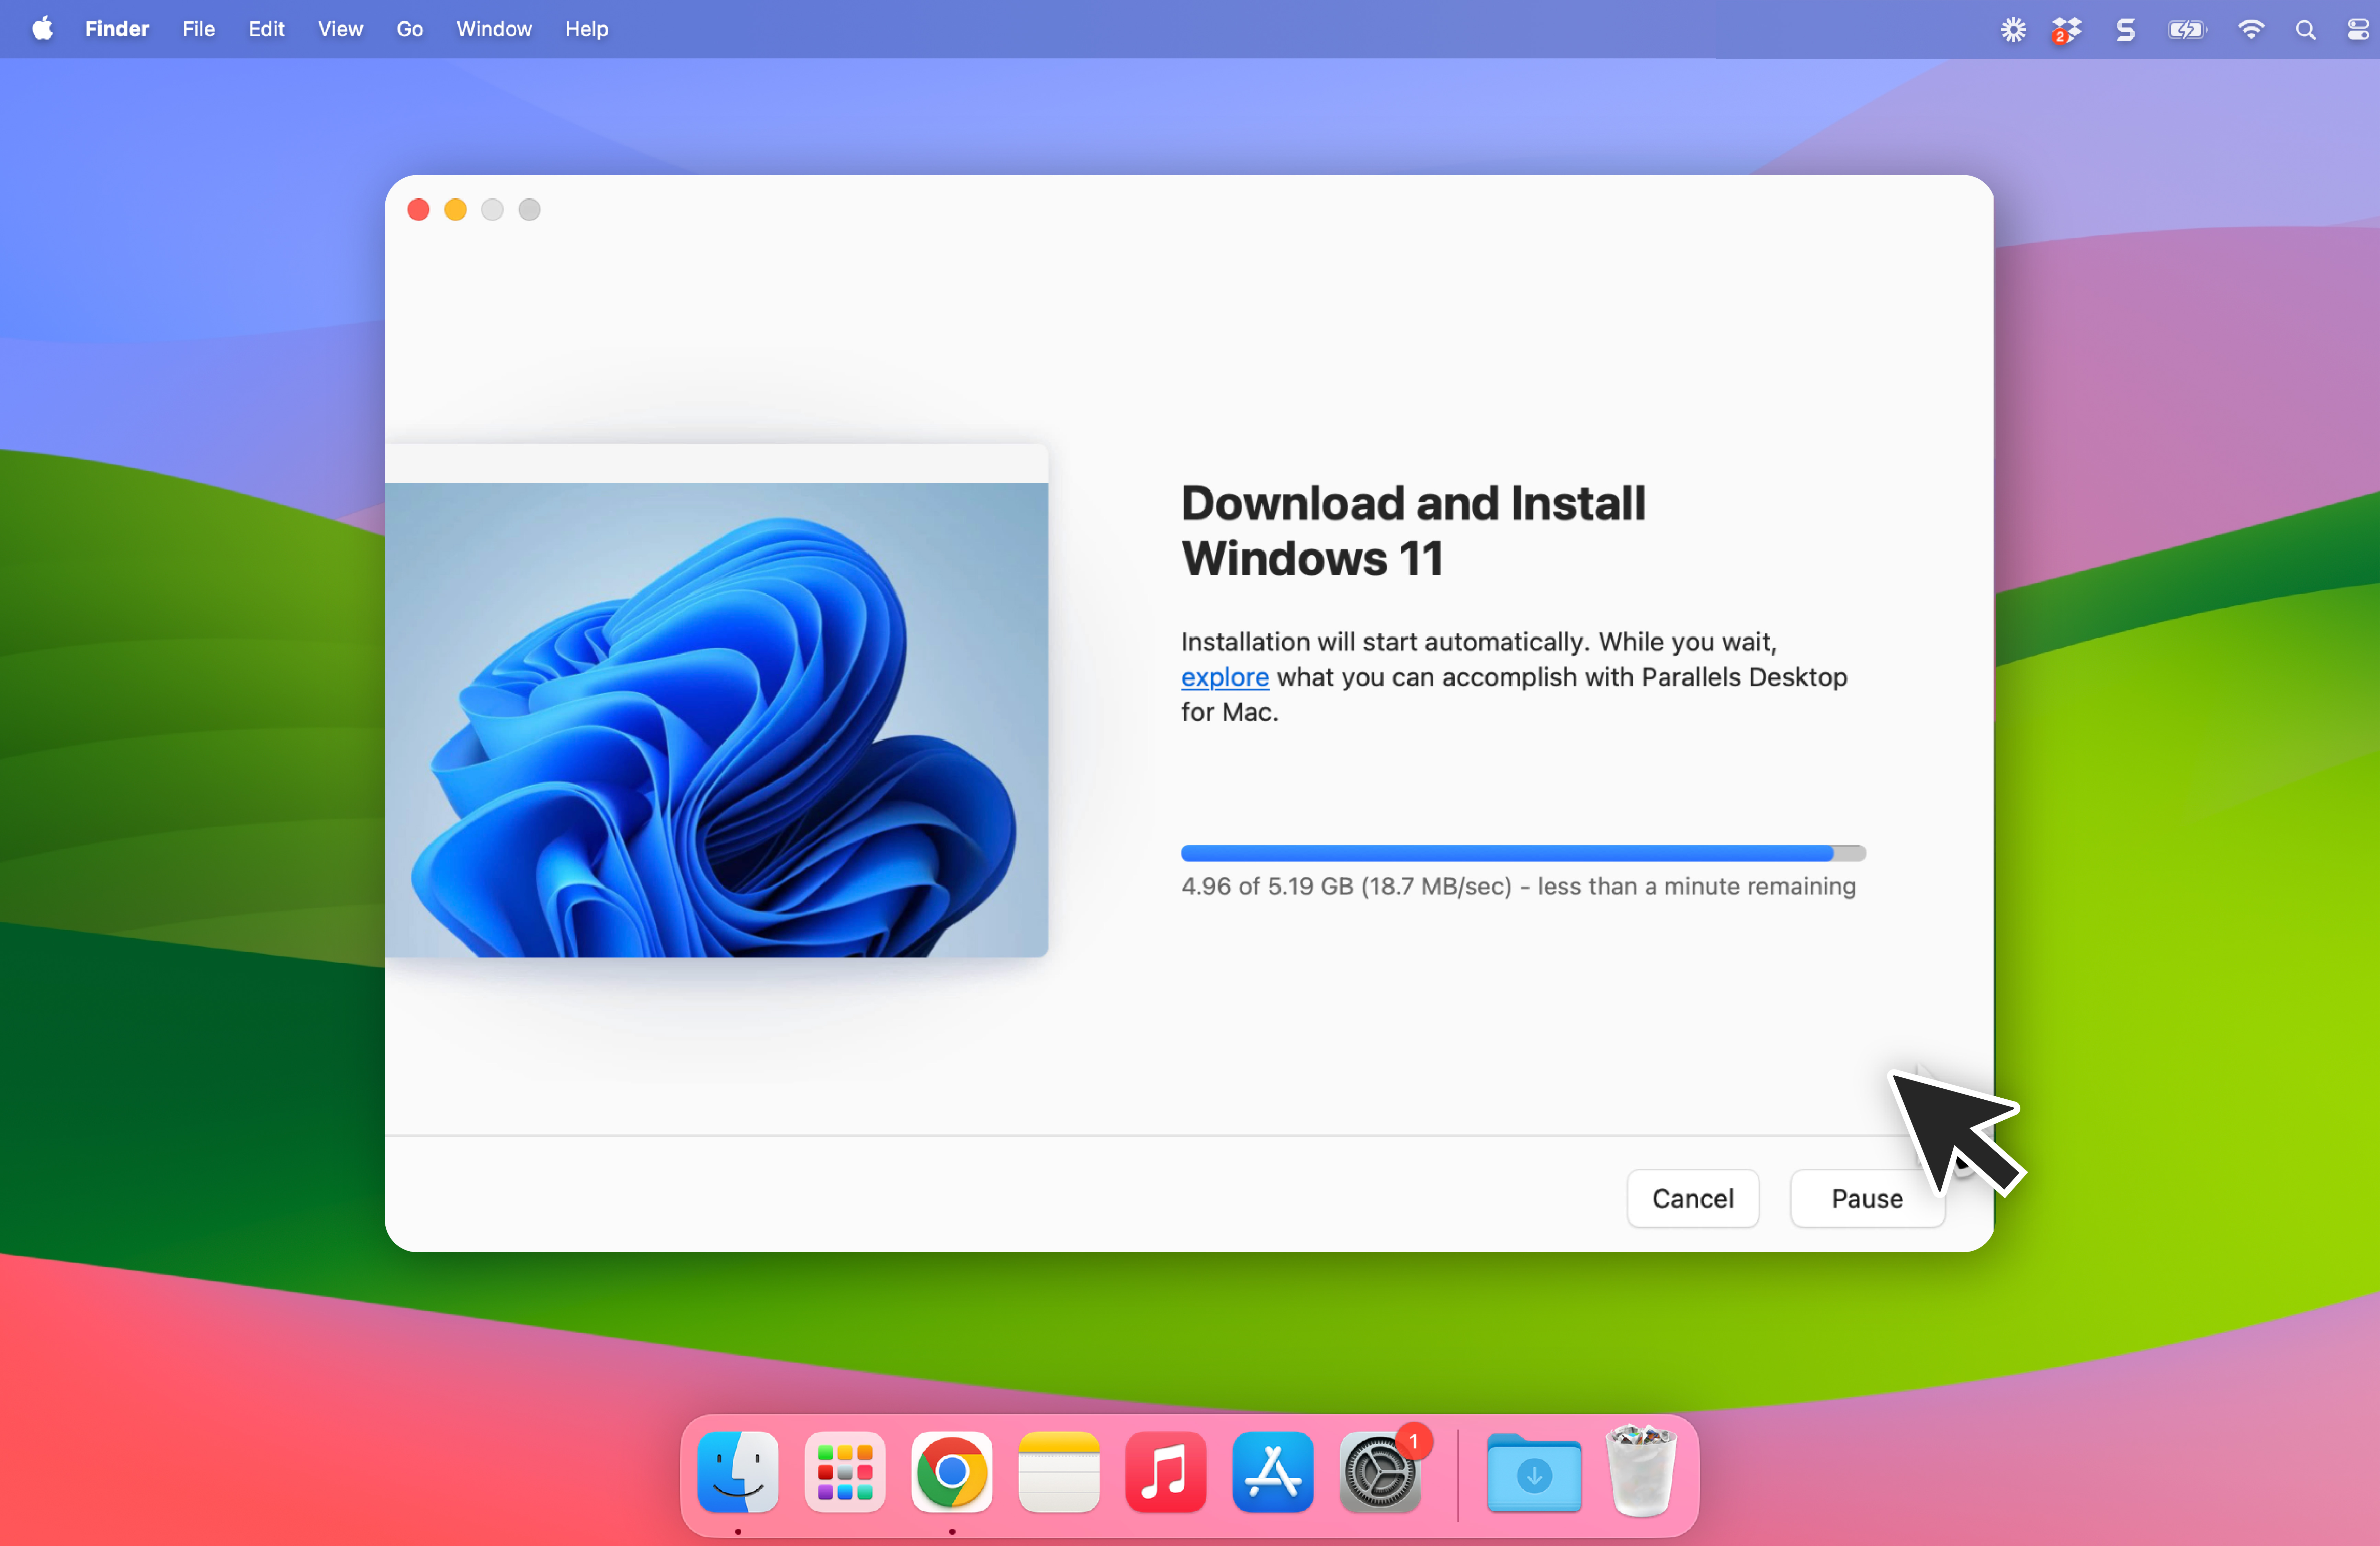
However, one question you may be asking is whether you need to go purchase a license for Windows. Here’s another great bit of news: No, you don’t!
After Parallels downloads and installs Windows, you can fully use Windows without purchasing a full license from Microsoft. And while everything will work just fine, you will be prevented from adjusting some settings. A small watermark will be displayed in the bottom-right corner of the screen, prompting you to purchase a license and activate your copy of Windows, but it’s not necessary (if you don’t want to). With that said, if you’d like to purchase and activate a full version of Windows, you can buy a license key from the Microsoft Store.
Step Three: Optimize Parallels for Articulate Storyline
Alright! So, now that you have Windows up and running on your Mac via Parallels, I’m sure you’re ready to get to work with Storyline. However, before you do that, you’ll want to take a moment to adjust a few settings within Parallels to make sure everything runs smoothly.
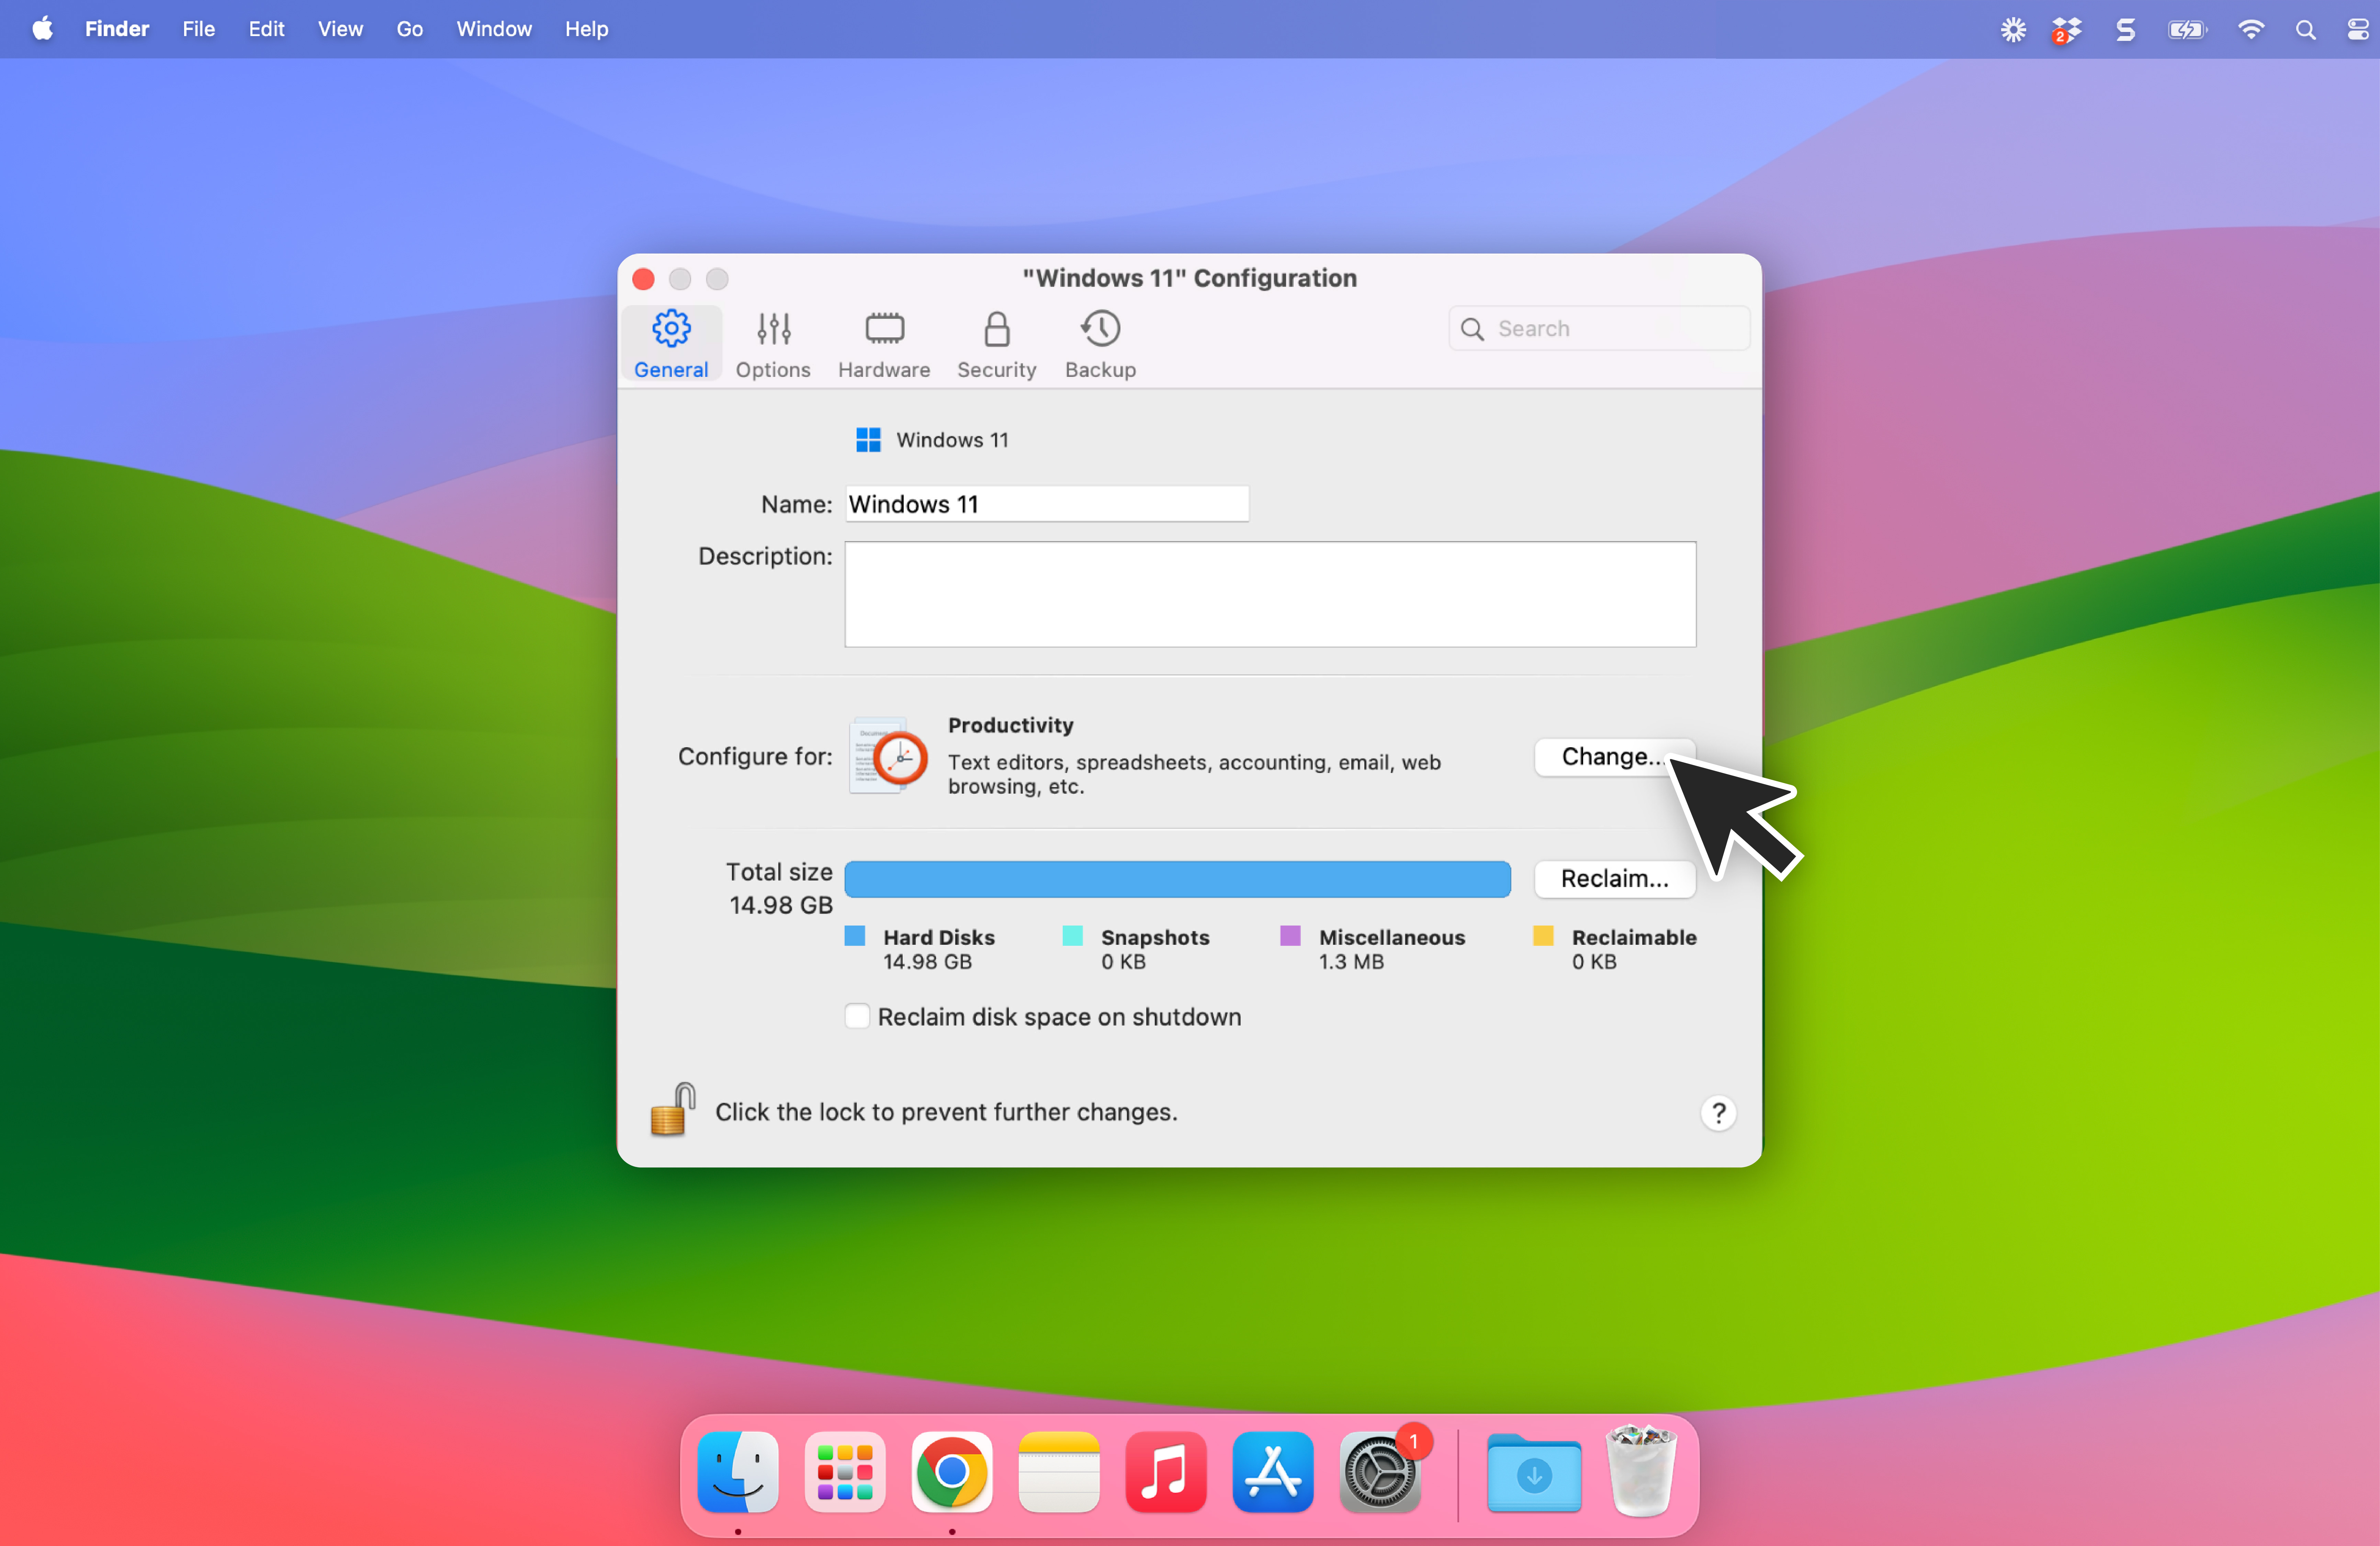
Take a few moments to adjust the following settings:
Disable the Shared Profile: The shared profile allows you to easily share your Windows files with your Mac side (and vice versa). In order for Storyline to run smoothly, the feature must be turned off so that your Windows files reside exclusively within the virtual Windows environment. See this Parallels article for how to turn off the Shared Profile. And see my tip below about transferring files between the Mac side and the virtual Windows environment.
Set Links to Always Open in Windows: When clicking on a link within the virtual Windows environment, you want to make sure it opens in Windows and not on your Mac side. Luckily, this is the default setting in Parallels; however, you can see this Parallels article to confirm these settings are enabled properly.
Disable Retina Resolution for Windows: If you’re using a Mac with a Retina display, the Articulate Storyline interface may look distorted, small, or hard to read. To fix this, you can see this Parallels article to disable Retina resolution for Windows.
Turn Off Coherence Mode: Coherence Mode allows you to view your Windows apps within your Mac environment as if they were native Mac apps. In order for Articulate Storyline to function properly, you can see this Parallels article to turn Coherence Mode off.
Improve Parallels / Windows Performance: Depending on the specs of your Mac, you can make several adjustments to improve the performance of Parallels and Windows by dedicating additional processing and memory power. See this Parallels article to adjust these settings.
Note, as you adjust each of these settings, you may be required to shut down and / or restart Parallels and Windows multiple times.
Step Four: Download & Install Articulate 360
So, once you’ve finally installed and configured Windows, it’s finally time to install Articulate 360. Remember, Articulate 360 is a suite that includes Storyline and several other programs. So, if you already have an Articulate 360 account, you can log in and download the Articulate 360 app.
Otherwise, if you don’t have an Articulate 360 account, you can sign up for a free trial.
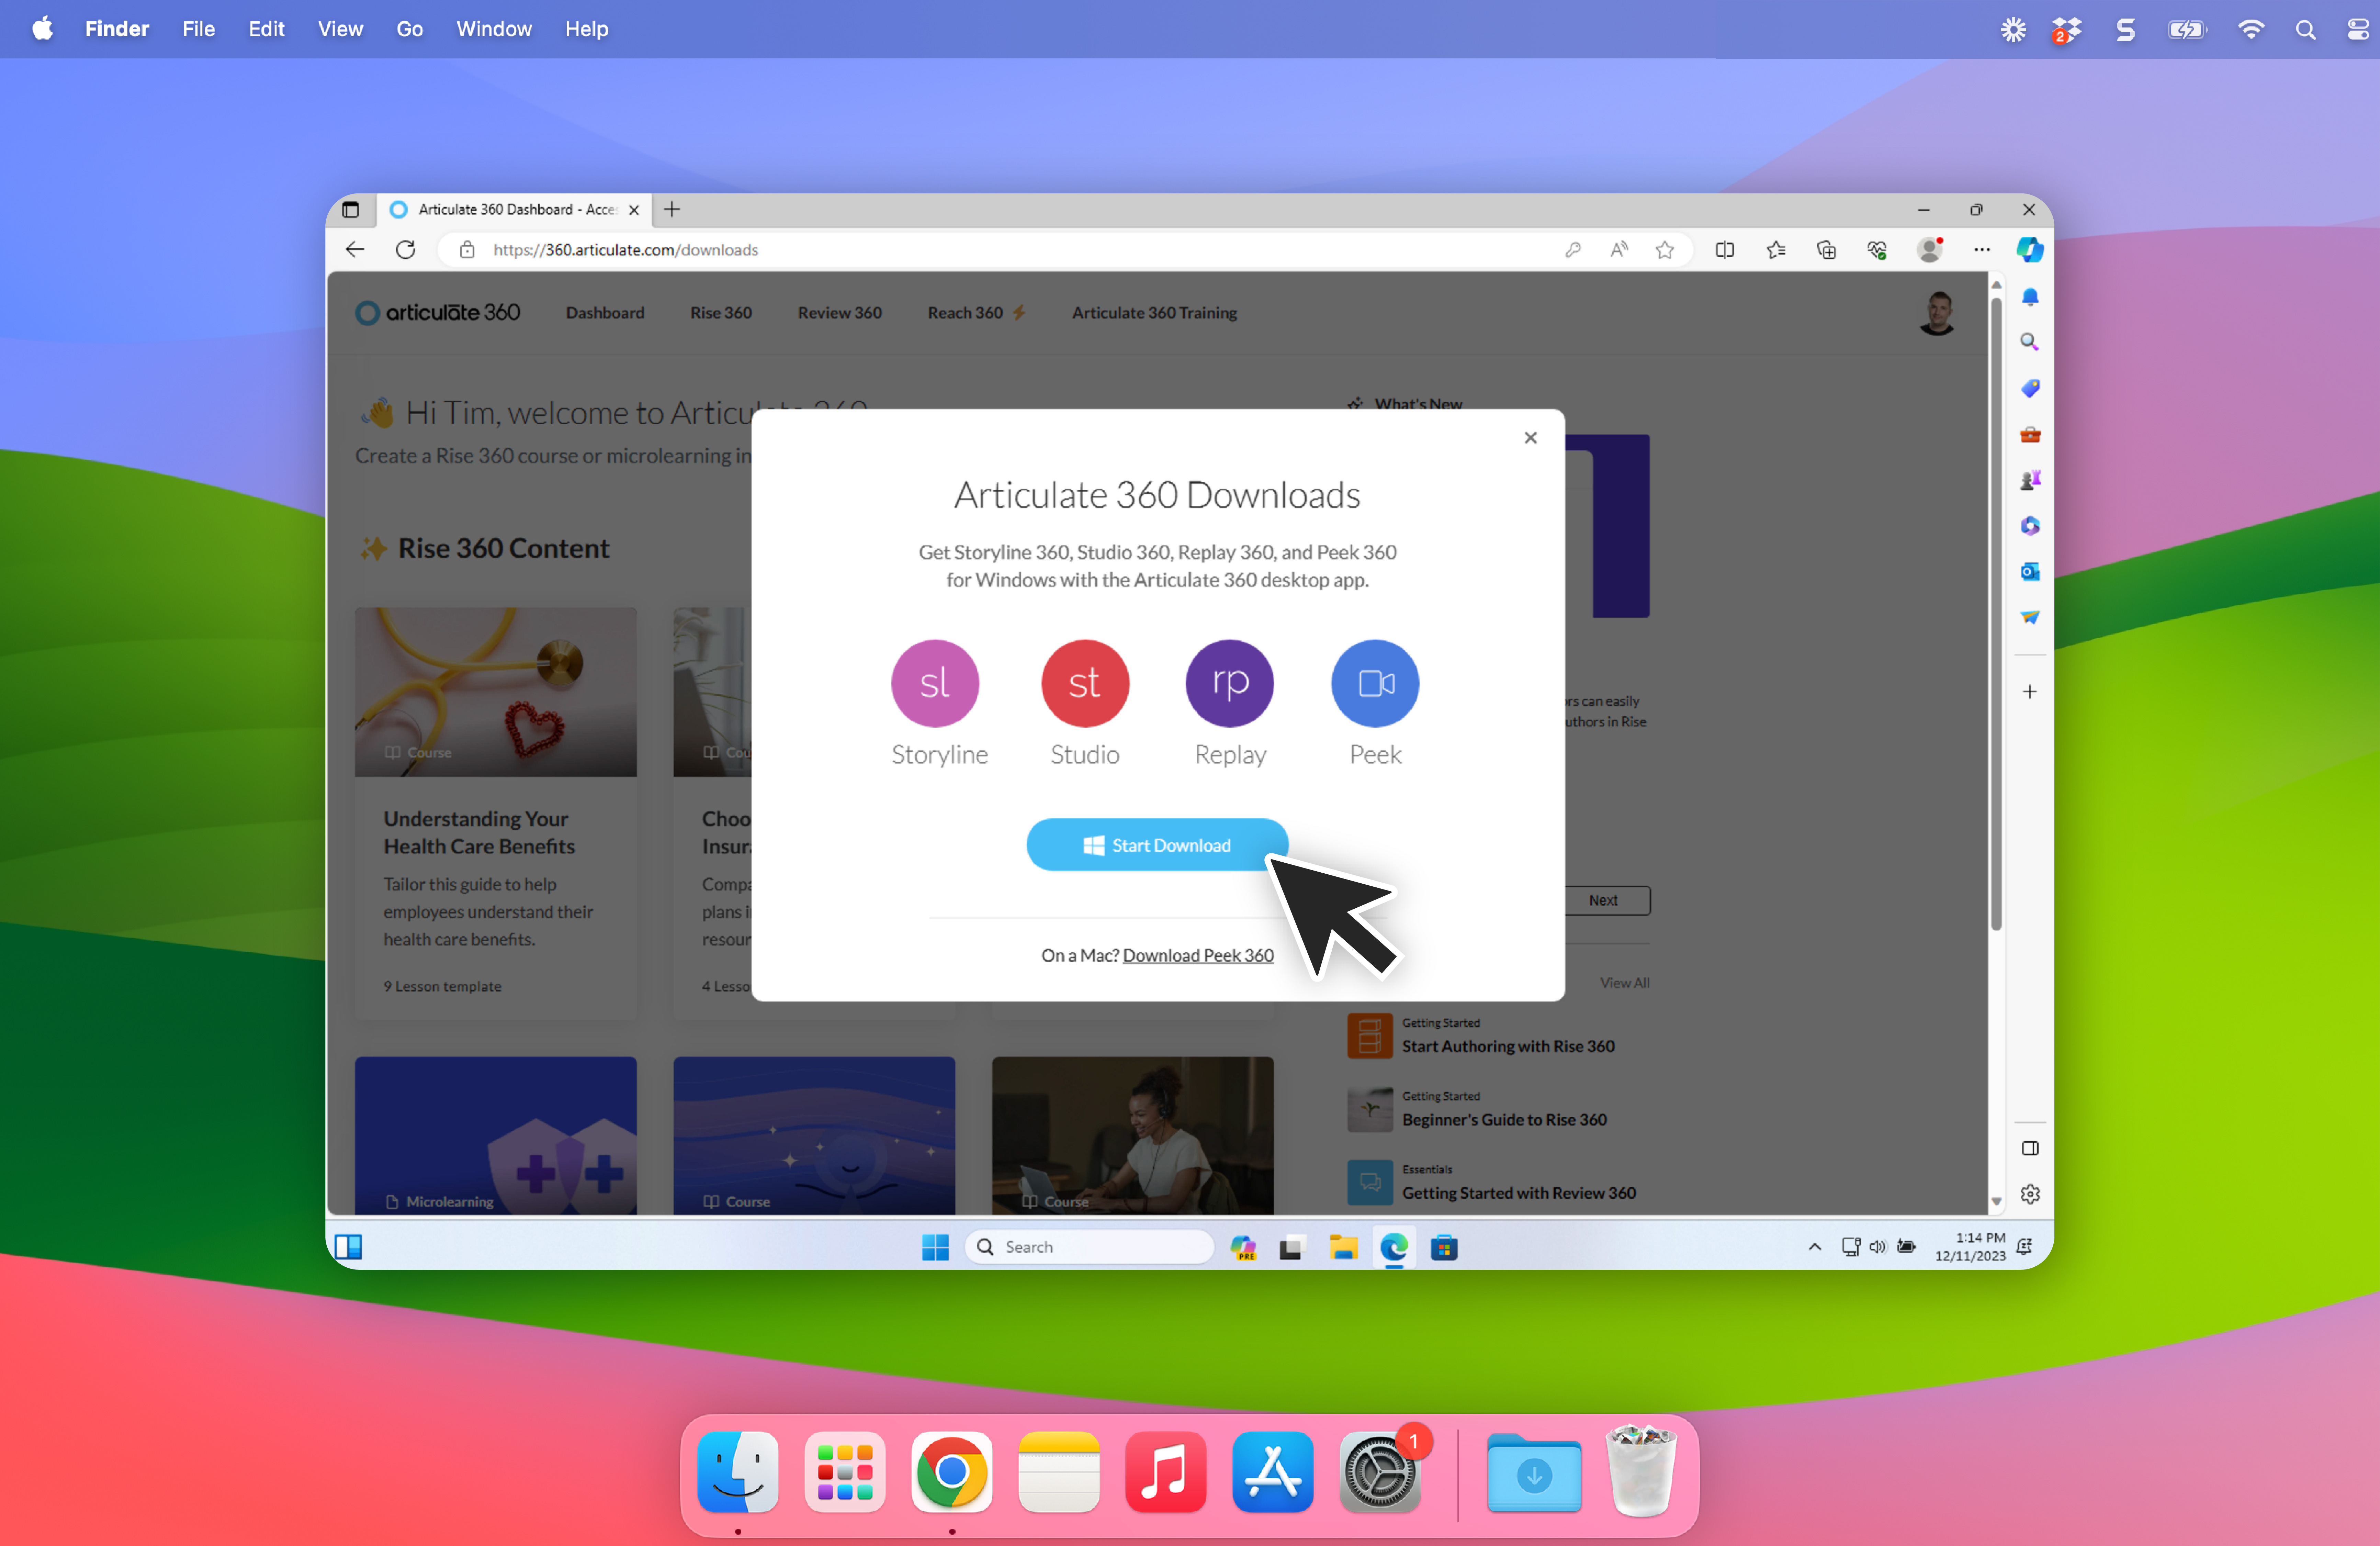
Step Five: Download & Install Articulate Storyline
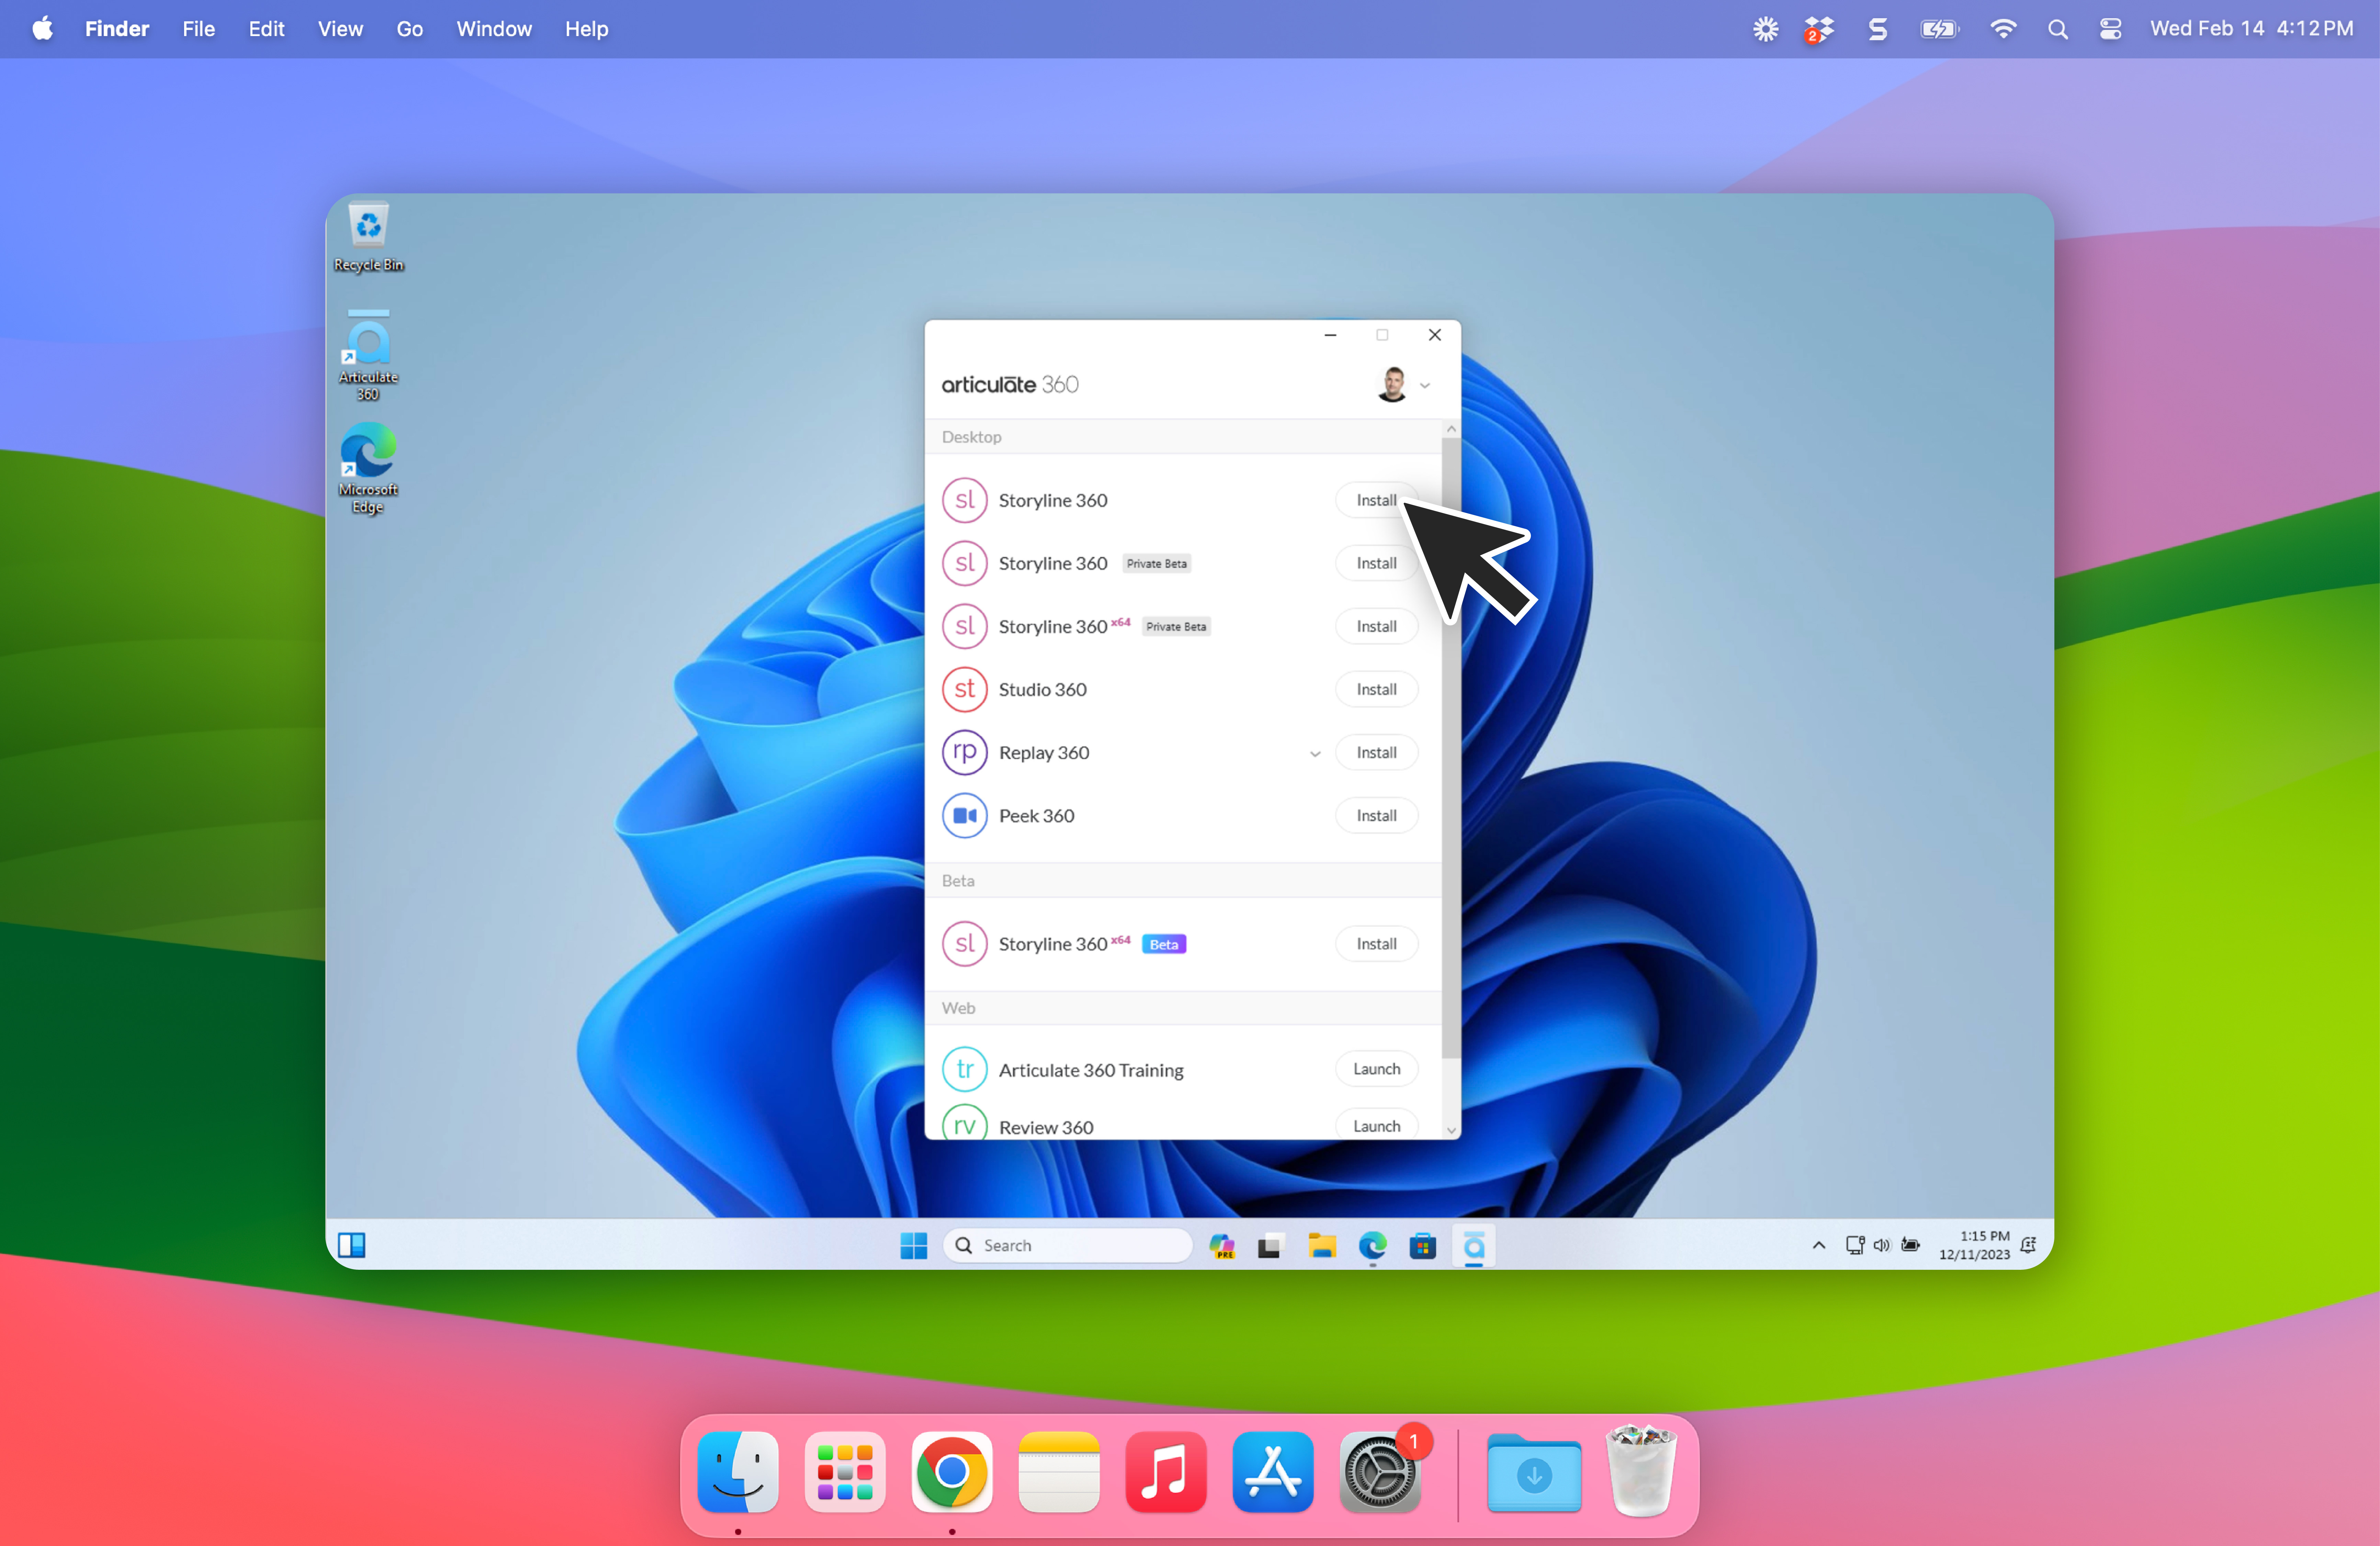
Once you’ve installed the Articulate 360 app, you can then choose the specific Articulate apps you’d like to install—in this case, Articulate Storyline. Simply click the Install button, and you’ll be good to go!
Tips for Using Articulate Storyline on a Mac
Now, before we finish this article, I want to provide some final tips for using Storyline on a Mac:
Transferring files between Mac and Windows: Because Articulate Storyline requires the Shared Profile in Parallels to be disabled, you can’t easily move files between your Mac side and the virtual Windows environment (and vice versa). To get around this, I suggest using a service like Dropbox, OneDrive, or another file-syncing service. Personally, I use Dropbox and have it installed on both my Mac and Windows environment so that when I create or edit a file on one side, all I have to do is throw it into Dropbox, and it will automatically sync to the other side.
Using the Delete Key: As you start using Articulate Storyline on your Mac, you may notice that the Delete key doesn’t work as intended. For reasons that make no sense to me, if you want to delete an object within Storyline, you need to press the Fn + Delete key. And trust me, you don’t want to know how many years I used to “delete” objects by right-clicking and selecting the Cut option before I accidentally discovered this keyboard combination.
Importing PowerPoint Files into Storyline: If you plan on importing any PowerPoint files directly into Storyline, then you must have PowerPoint installed on the Windows side of your virtual machine.
Next Steps for Learning How to Use Articulate Storyline
Okay! So, after you have Articulate Storyline installed and running on your Mac via Parallels, what’s next? Well, if you already know how to use Storyline, then go do your thing! Otherwise, if you’re new to Storyline, then I suggest checking out this playlist of videos to help you get up and running.
The Bottom Line
So, that’s how you can install and use Articulate Storyline on a Mac via Parallels. And yes, these steps can seem like some annoying hurdles to jump through; however, they can get up and running in less than 20 minutes—and once you’re done, you’ll find that Windows often runs better on a Mac than it does on a Windows computer!
So, what other tips or questions do you have about using Storyline on a Mac? Share them by commenting down below!