How to Use Slide Masters & Layouts in Articulate Storyline
When you’re starting to create a new project in Articulate Storyline, you might be inclined to jump right in and start adding content to your slides. And while there’s nothing wrong with that, taking the time to create slide masters (sometimes called master slides) helps you save time and establishes a consistent look and feel for your eLearning course.
But how do you use slide masters in Storyline? Well, the good news is that if you’ve ever used slide masters in PowerPoint, they work exactly the same way in Articulate Storyline.
So, in this article, I’ll share how to create and edit slide masters in Articulate Storyline.
What are Slide Masters?
Before we jump in and learn how to create and edit our slide masters in Storyline, let’s talk about what they are and why you’d want to create them in the first place.
When you first start designing and developing an eLearning course in Storyline, one of your priorities should be creating a visually consistent and aesthetically pleasing experience. This includes using consistent fonts, colors, text, objects, and slide layouts. This is especially true when you’re designing a course that needs to adhere to your company’s (or client’s) brand standards and style guide.
For example, if you’re building a series of slides that will include the same design elements (like the company logo, etc.), then it might save you time to create a reusable slide master. That way, when you need to create another slide with the same design, you can simply apply the slide master with all of the needed elements rather than recreating it from scratch.
Additionally, if you need to change the design later (e.g., move the logo or change a color), you can simply update your slide masters, and this will automatically update all of the affected slides.
Free Course: 10-Day Career Mindset Reset
Inside The eLearning Designer’s Academy, we think a little differently about professional development and career growth. Enroll in our free 10-Day Career Mindset Reset to start thinking differently about your skills, career, and confidence!
How to Create Slide Masters in Articulate Storyline
So, now that we have a conceptual understanding of what slide masters are and what benefits they offer, how do you actually edit and create slide masters in Storyline?
Well, the first thing you need to do is switch to Slide Master view by clicking on the View tab in the ribbon and selecting the option for Slide Master. Once you’re in Slide Master view, you’ll notice that it looks very similar to what you’d see in PowerPoint.
On the left panel, you’ll see thumbnails for your slide master (the large thumbnail) along with the various layouts below it (the smaller thumbnail).
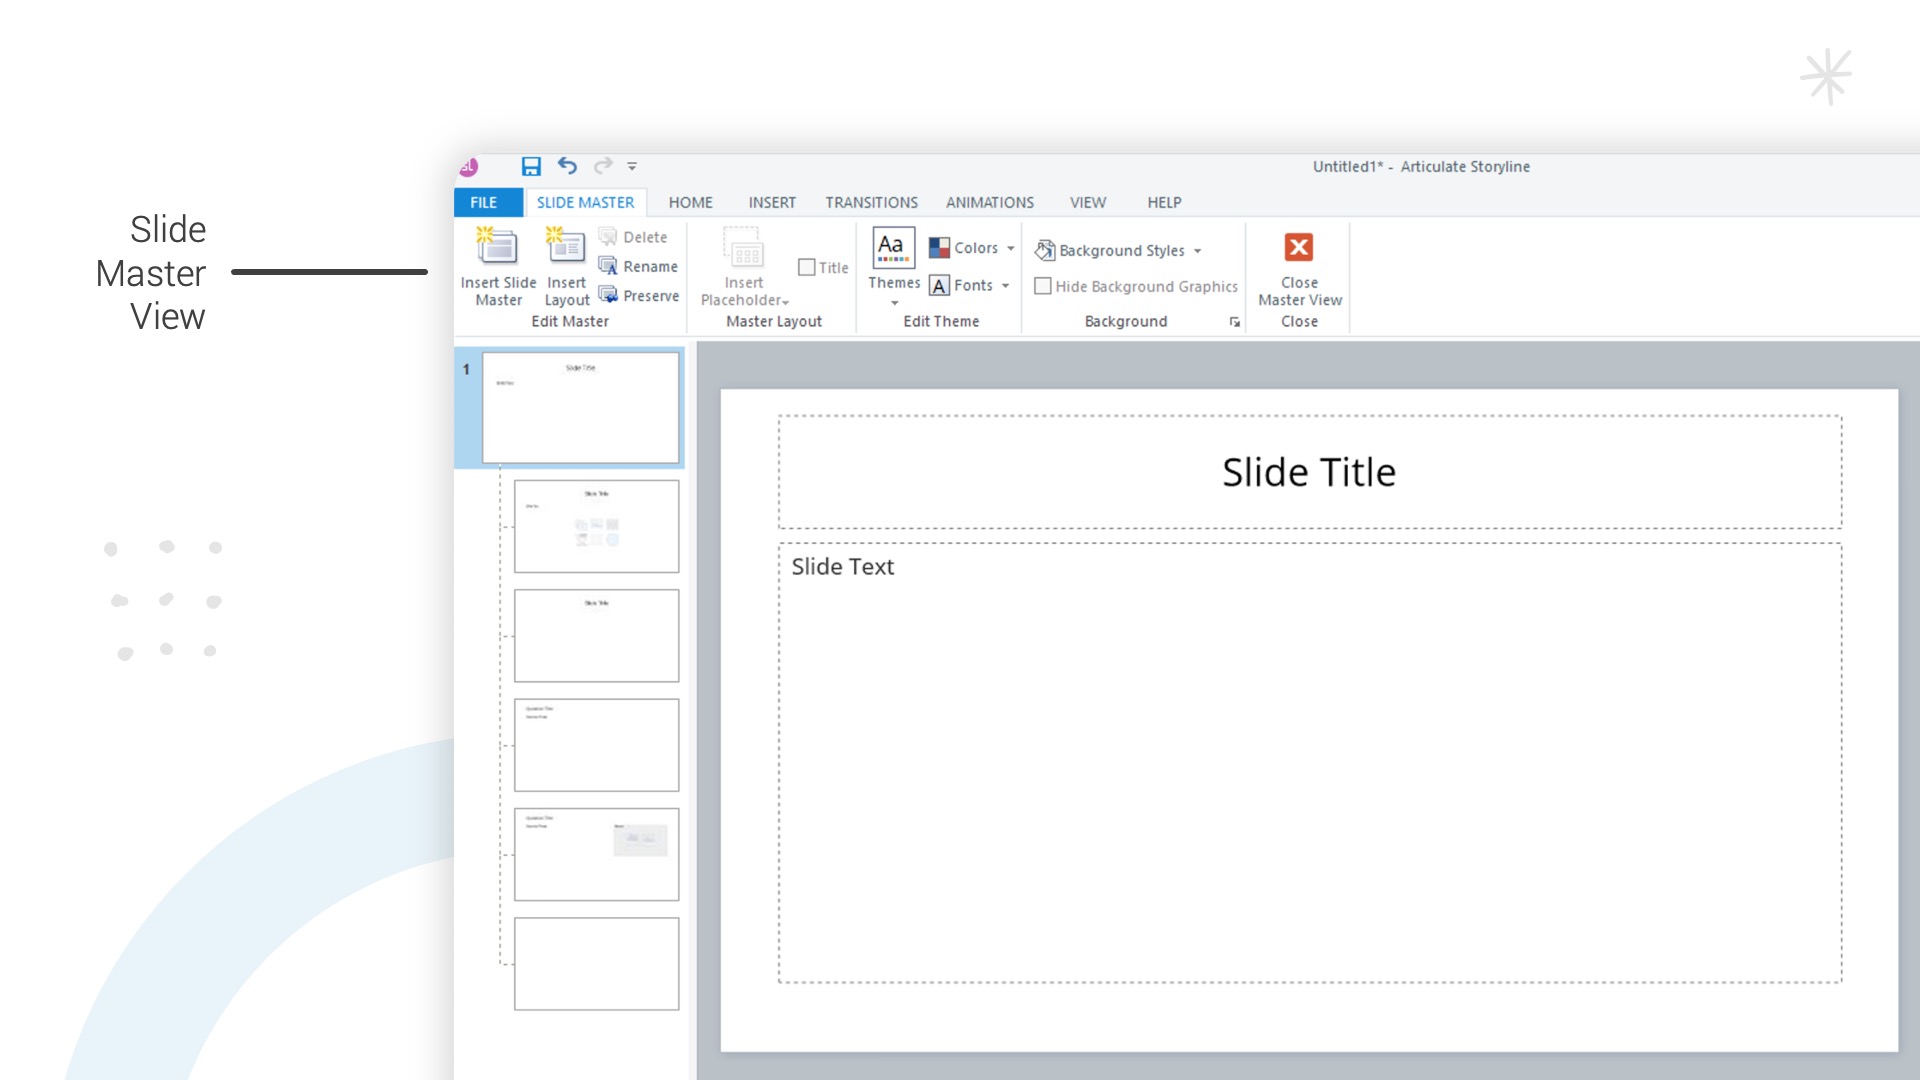
It’s important to remember that your slide master and layouts have a child-parent relationship. That means anything you add to your slide master will automatically be applied to all of the layouts. However, anything you add to an individual layout will only apply to that layout.
In Storyline, a layout is a variation of your slide master, which can include different design elements and content placeholders. By default, Storyline provides five basic layouts:
Title and Content
Title Only
Question
Question with Media
Blank
So, for example, if you plan on having a logo on every slide, you might add that to the slide master but design slightly different layouts or versions for different purposes.
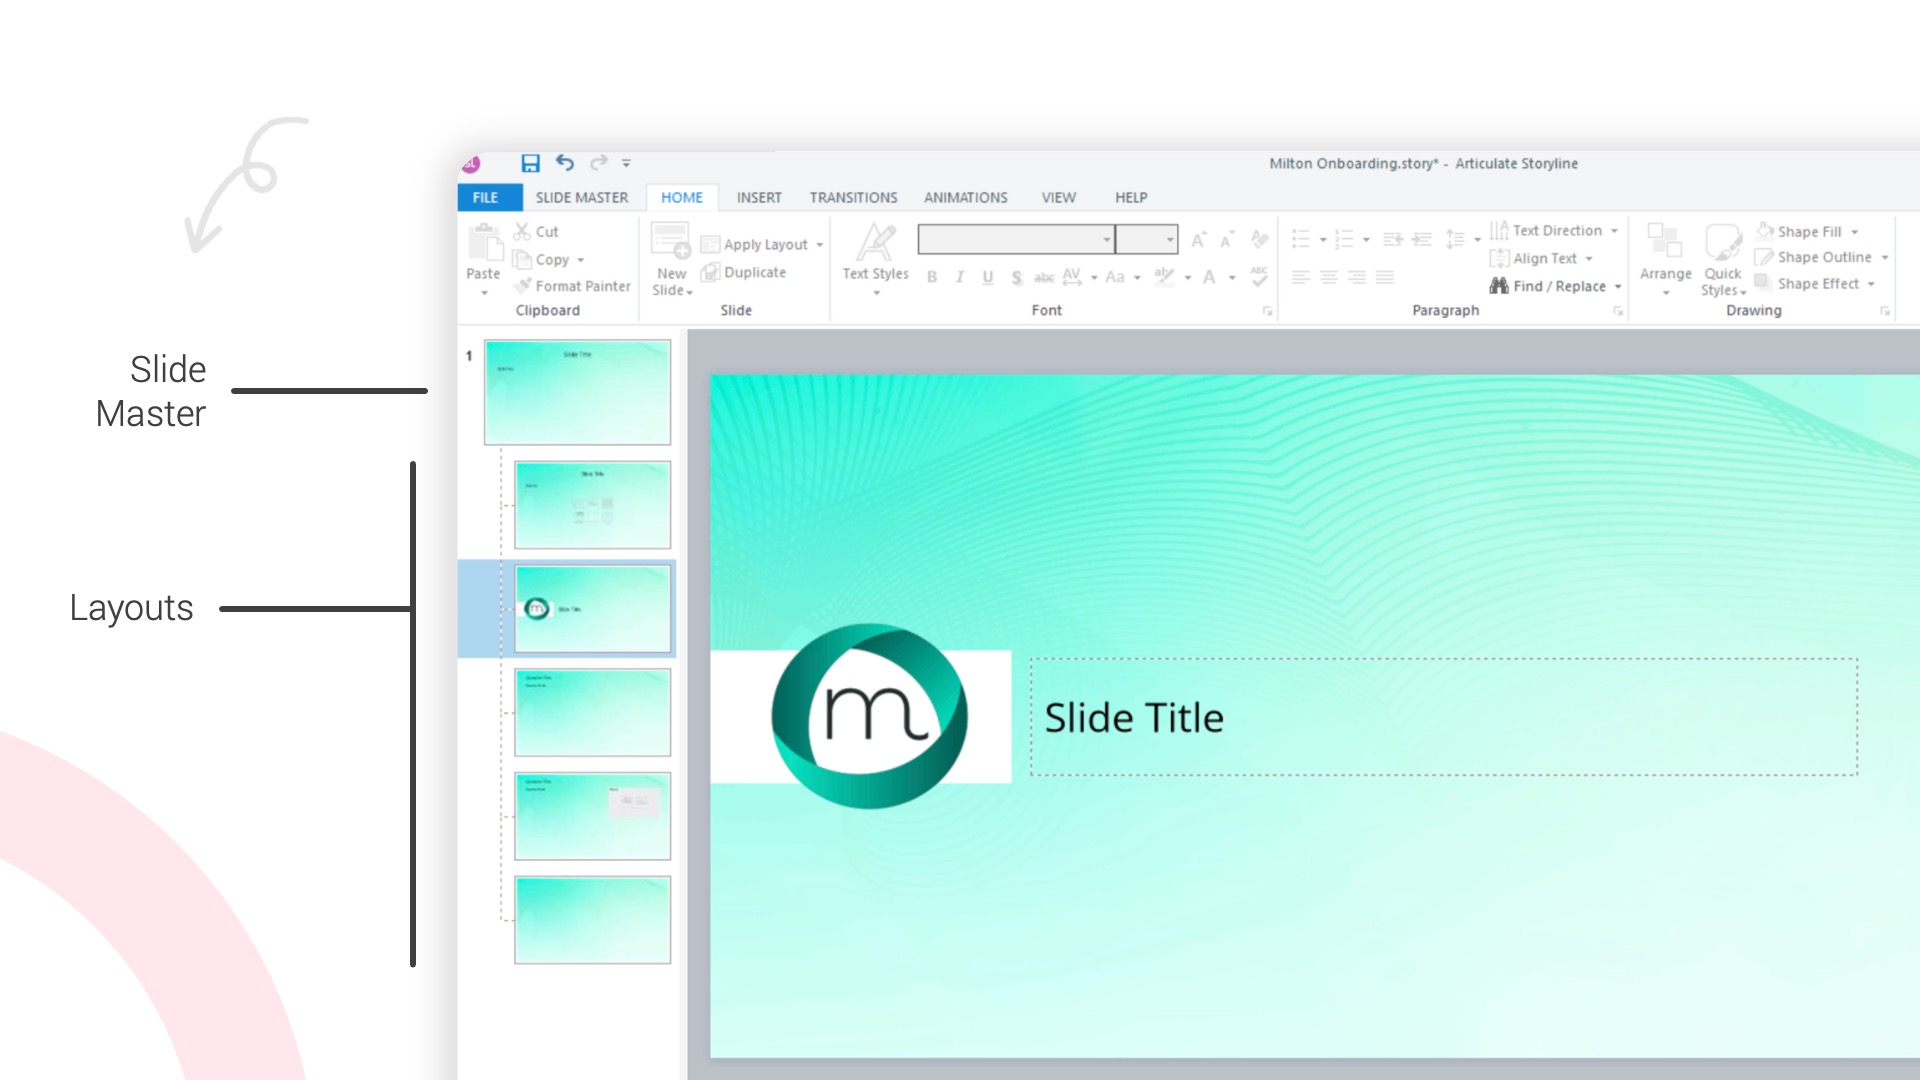
As you design your various layouts, you are free to add any images, shapes, or other design elements you’d like. You can also insert text and image placeholders for elements that will differ from one slide to the next.
Finally, beyond the standard layouts Storyline provides, you can create additional slide masters and layouts as needed. Simply right-click anywhere in the left panel and select the option to Insert Slide Master or Insert Layout.
How to Apply Layouts to Slides
After you’ve created and edited your slide masters and layouts, how do you actually use them? Well, before you can use your slide masters and layouts, you need to remember to exit slide master view. To do that, simply click the Slide Master tab in the ribbon and select Close Master View.
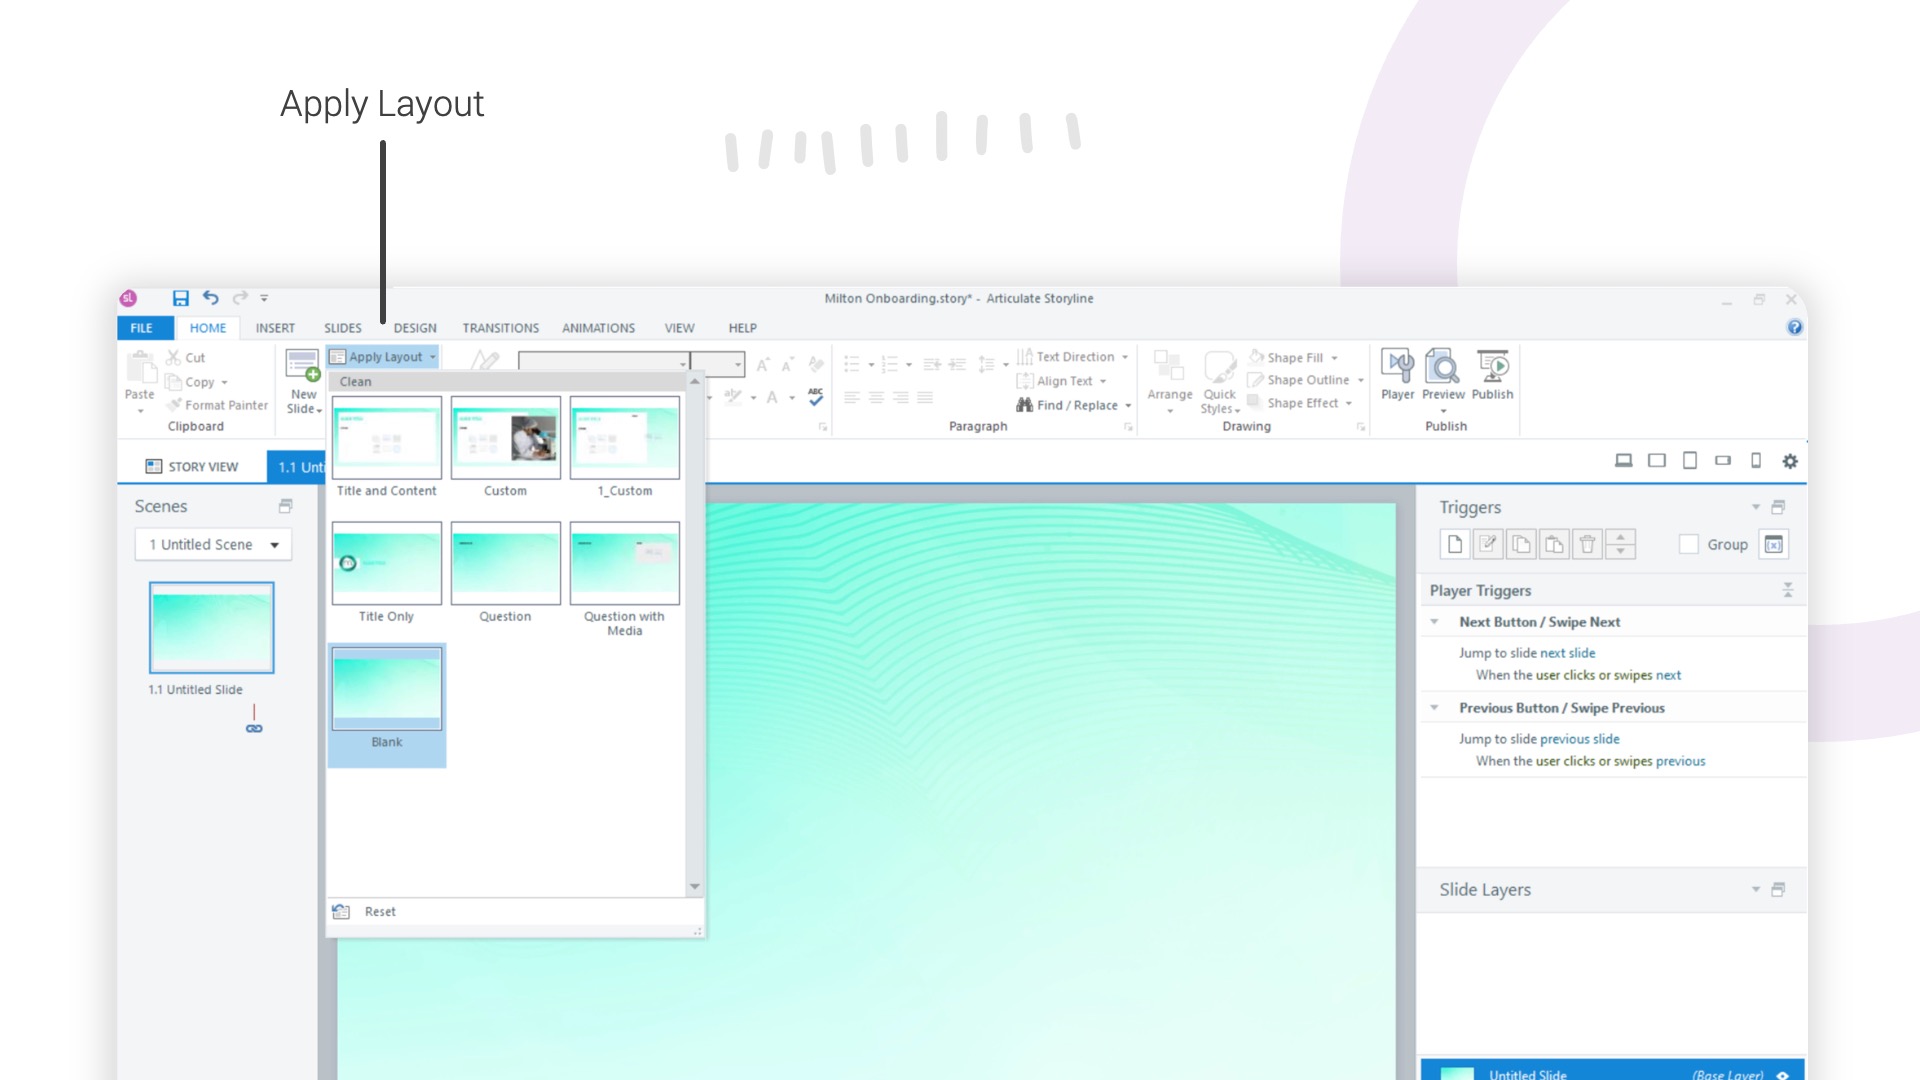
Once you’re out of slide master view, you can apply a layout by clicking on the Apply Layout option in the Home tab and selecting your desired layout. This will apply all of the design elements you added in slide master view; however, the only editable items will be any text of media placeholders you may have incorporated into your layout.
Next Steps for Learning How to Use Articulate Storyline
Okie dokie! So, once you have an understanding of how to edit and create slide masters, what’s next? Well, at this point, you’re ready to start creating your very first scenes and slides along with adding content.
So, feel free to check out these articles and videos to continue your learning:
How to Add & Edit Content in Articulate Storyline (coming soon)
The Bottom Line
Slide masters are a great way to help you save time and maintain design consistency within your eLearning courses. So, what other tips or questions do you have about working with and creating slide masters in Articulate Storyline? Share them by commenting down below!