How to Create a New Project in Articulate Storyline
When you’re first getting started with Articulate Storyline 360, you might find yourself wondering what the best way is to start creating your first project. And while it’s relatively simple to get up and running, once you understand how to navigate the interface, you have to remember that Storyline is a fully custom eLearning authoring tool. Unlike tools such as Rise, Adobe Captivate, and others, Storyline is a fully customizable eLearning authoring tool, which means that it doesn’t rely on templates or fixed layouts for the authoring experience. To put it simply, if you can imagine it, there’s a strong chance you can create it in Articulate Storyline.
So, how do you get started creating a new eLearning project in Storyline? Well, in this article, I’ll share the various ways you can do just that!
Launch Articulate Storyline
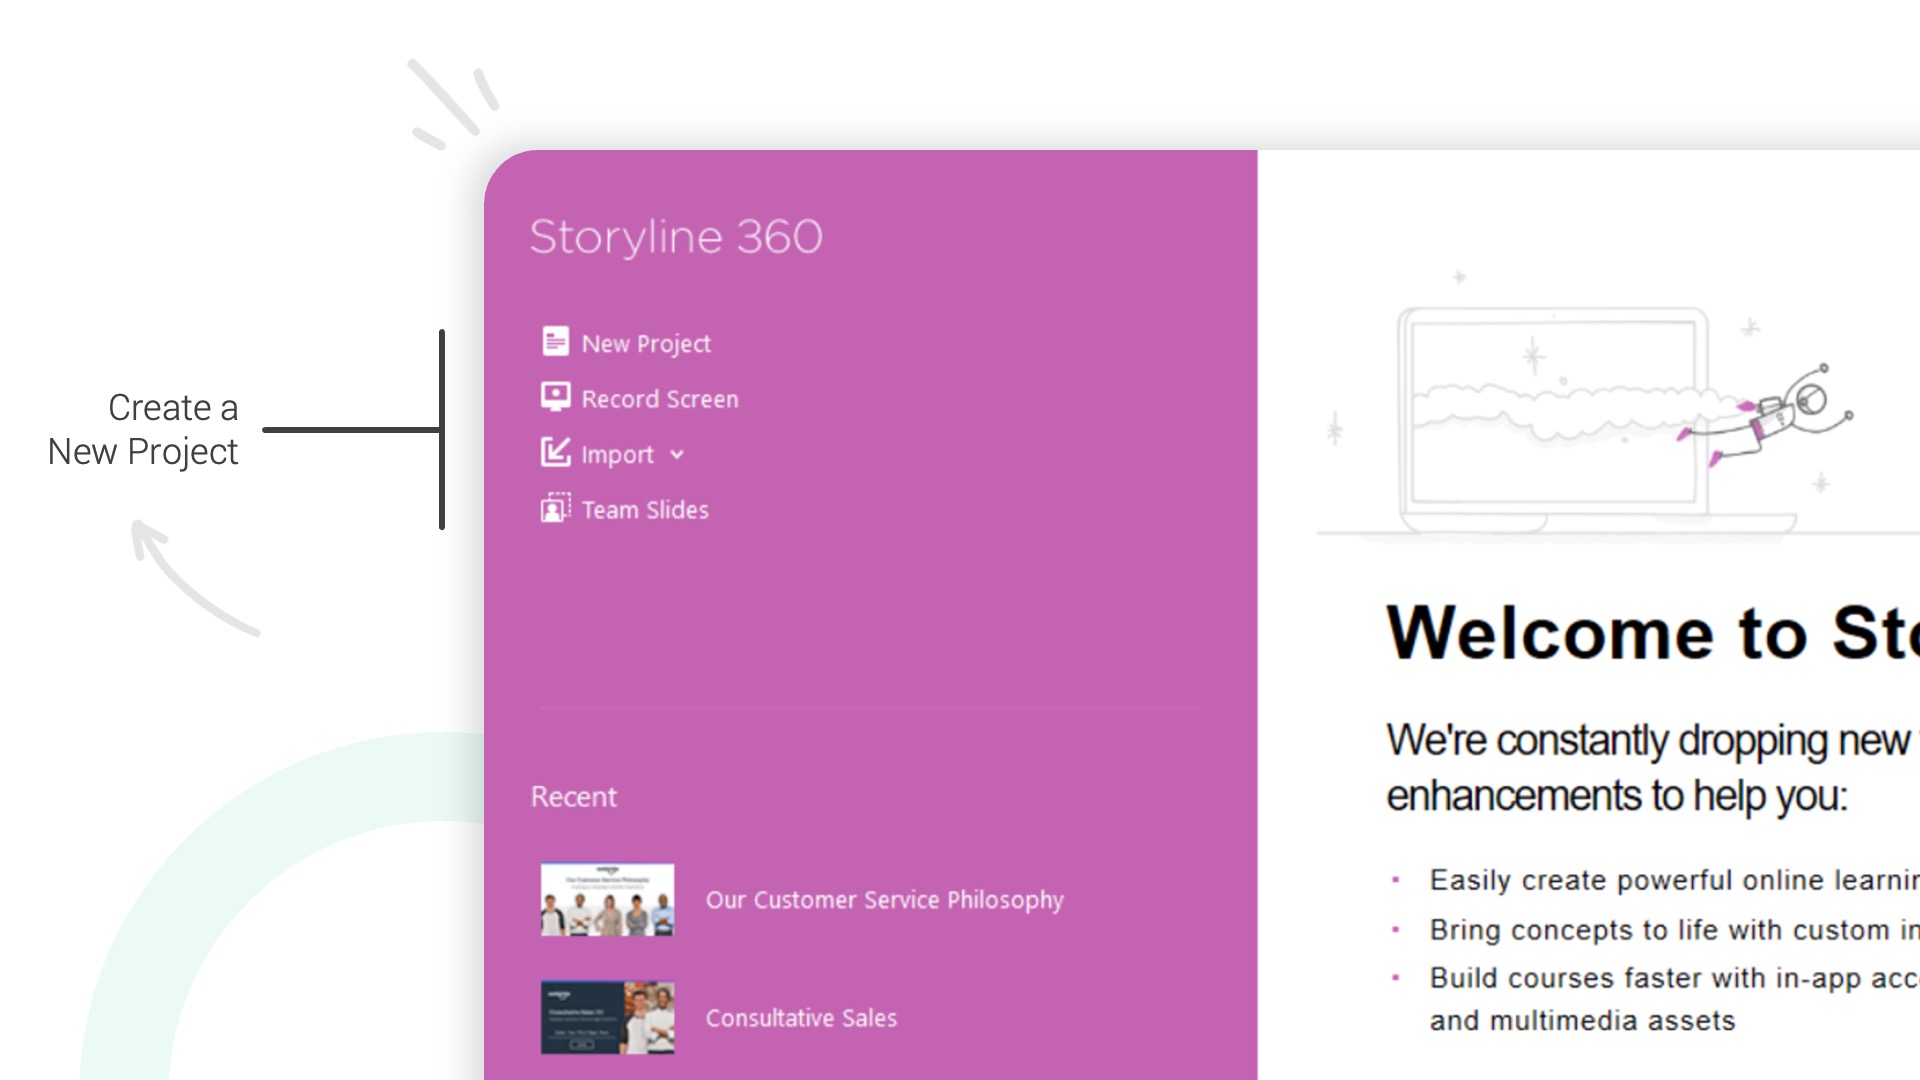
When you first launch Articulate Storyline, you’re presented with the start screen, which provides several options for creating a new project. From here, you can select…
New Project: This option lets you create a new, blank project from scratch.
Record Screen: This option lets you create a new project by starting with a screen recording. This option will immediately launch you into Articulate’s screen recording tool.
Import: This option lets you create a new project by importing various types of content in Storyline, such as a PowerPoint file, etc.
Team Slides: This option lets you create a new project by importing saved template slides from your Articulate 360 Team account (only available to those working on an Articulate 360 Teams plan).
Create a New Project from Scratch
The most commonly used option for creating a new project in Storyline is to create a blank project. When you select this option, Storyline will open a new project with a single blank slide in Story View. From here, you can get started adding and renaming new scenes and slides, along with adding content to your slides.
Of course, what you do here really depends on the type of eLearning course you’re designing and developing. However, there are three main actions I usually recommend taking to help start your project off on the right foot…
Adjust the Slide Size: The first thing you always want to do before you start adding content to any of your slides is to adjust and set your slide size to your desired dimensions. By default, Storyline provides you with a blank slide with a 4:3 aspect ratio. While this might work for your project, a 4:3 aspect ratio was ideal back in the day when we all used those clunky desktop computers with huge square monitors. Nowadays, most screens and devices use a widescreen format. So, I usually recommend going with a 16:9 aspect ratio, which will give you more real estate to design your content and better complement modern devices.
Create Slide Masters: Next, if you already have a sense of the visual design of your eLearning course, it’s usually a good idea to create your own set of slide masters, also commonly called “master slides.” Slide masters work exactly the same way in Storyline as they do in PowerPoint and give you the ability to design a series of layouts with any default objects, graphics, and text throughout your course. This can help you save time and maintain design consistency as you use Storyline to develop your eLearning project.
Save the Project: Finally, after you’ve created your new project in Storyline, you’ll want to take a moment to save your project. While Storyline does offer an auto-recovery option, I don’t recommend relying on it as an option for auto-saving your project. Instead, my rule of thumb is to save early and often. So, after you save your project, you’ll get a .Story file, which is a self-contained file that includes all of your project assets, etc. Note: To help avoid corrupted files, you always want to open and work with your Storyline projects on your local hard drive.
Free Course: 10-Day Career Mindset Reset
Inside The eLearning Designer’s Academy, we think a little differently about professional development and career growth. Enroll in our free 10-Day Career Mindset Reset to start thinking differently about your skills, career, and confidence!
Add New Slides
Once you’ve created your new project, adjusted your slide size, and saved your project, it’s time to start adding slides and content. Because Articulate Storyline is a slide-based eLearning authoring tool, creating and editing slides is nearly identical to PowerPoint but with a boatload of other options to make your content interactive.
While there are many different options for adding new slides to your Storyline project, the most common include creating slides from scratch, importing from PowerPoint, or importing from the Content Library.
Create Slides from Scratch
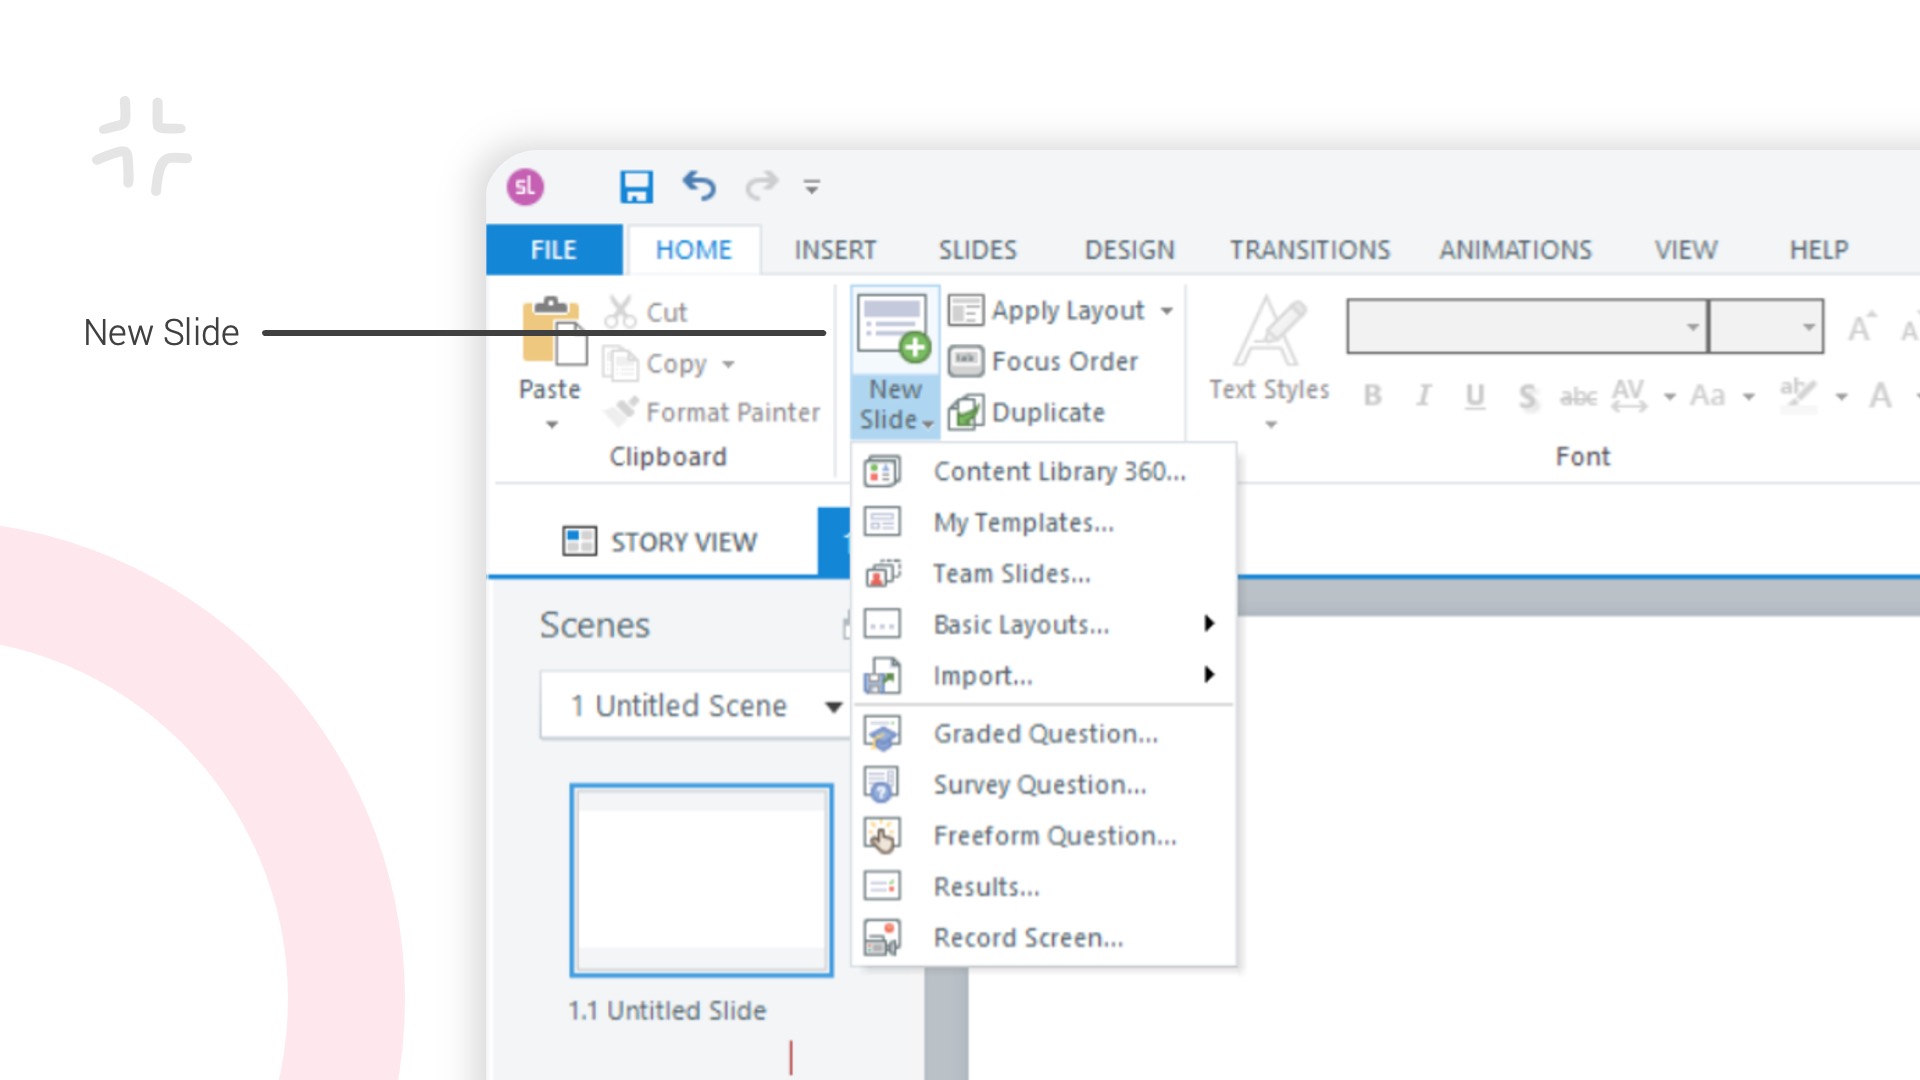
Perhaps the most common and easiest way to add new slides to your Storyline project is to create slides from scratch. While you can easily add new blank slides by clicking the New Slide dropdown from the Home or Slides tabs in the ribbon, you can also right-click below any existing slide to add a new slide.
Beyond adding blank slides, if you create your own slide masters, you can also select from any of the layout options you may have previously created. And, of course, you can also choose to insert questions slides, results slides, or a screen recording slide.
Import Slides from PowerPoint
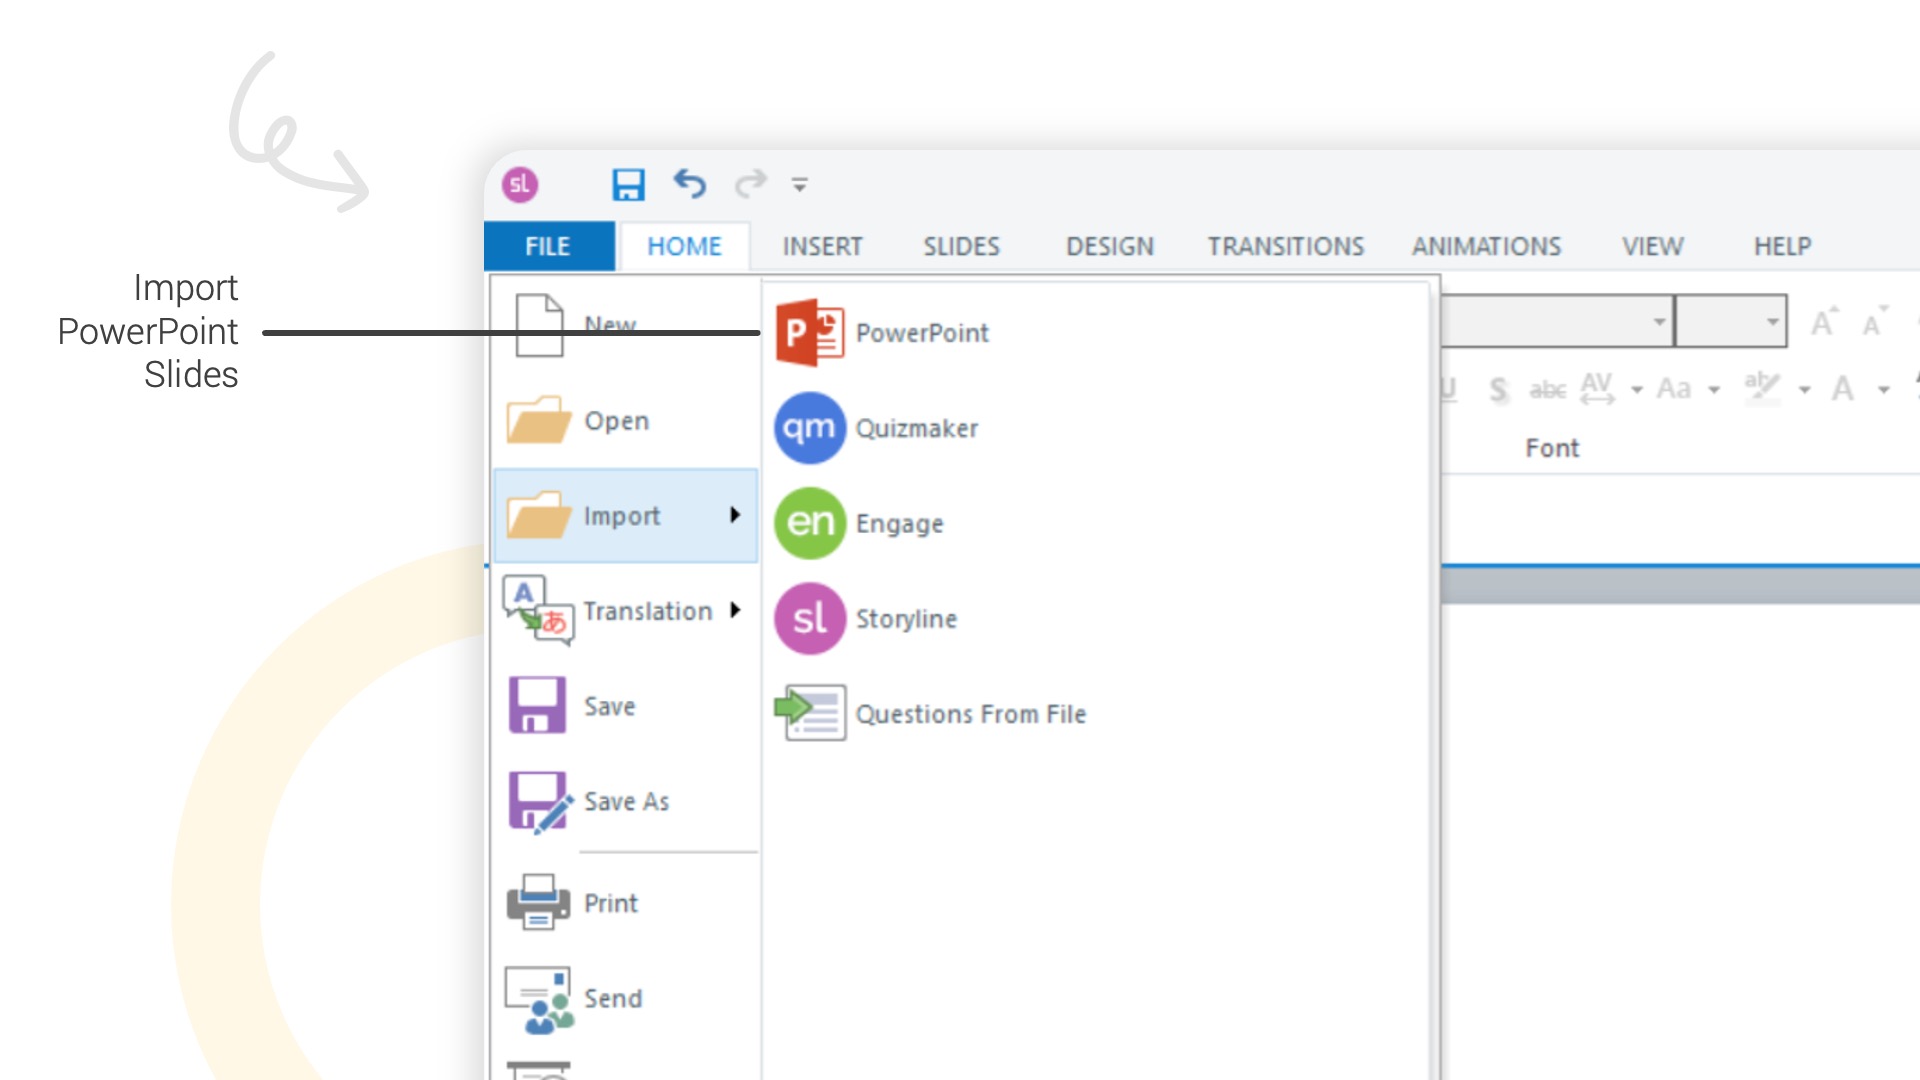
In addition to creating slides from scratch, you can import existing PowerPoint decks or templates directly into Articulate Storyline. When importing from PowerPoint, Storyline “scans” your selected PowerPoint file and converts the shapes, text, and images into objects you can edit directly in Storyline.
And while importing slides from PowerPoint to Articulate Storyline can help you save time, it’s usually a good idea to conduct a quality assurance check of your imported content as not all features, graphics, animations, or other elements from PowerPoint are directly supported in Storyline (i.e., SmartArt, certain animations and transitions, etc.).
Import Slide Templates from the Content Library
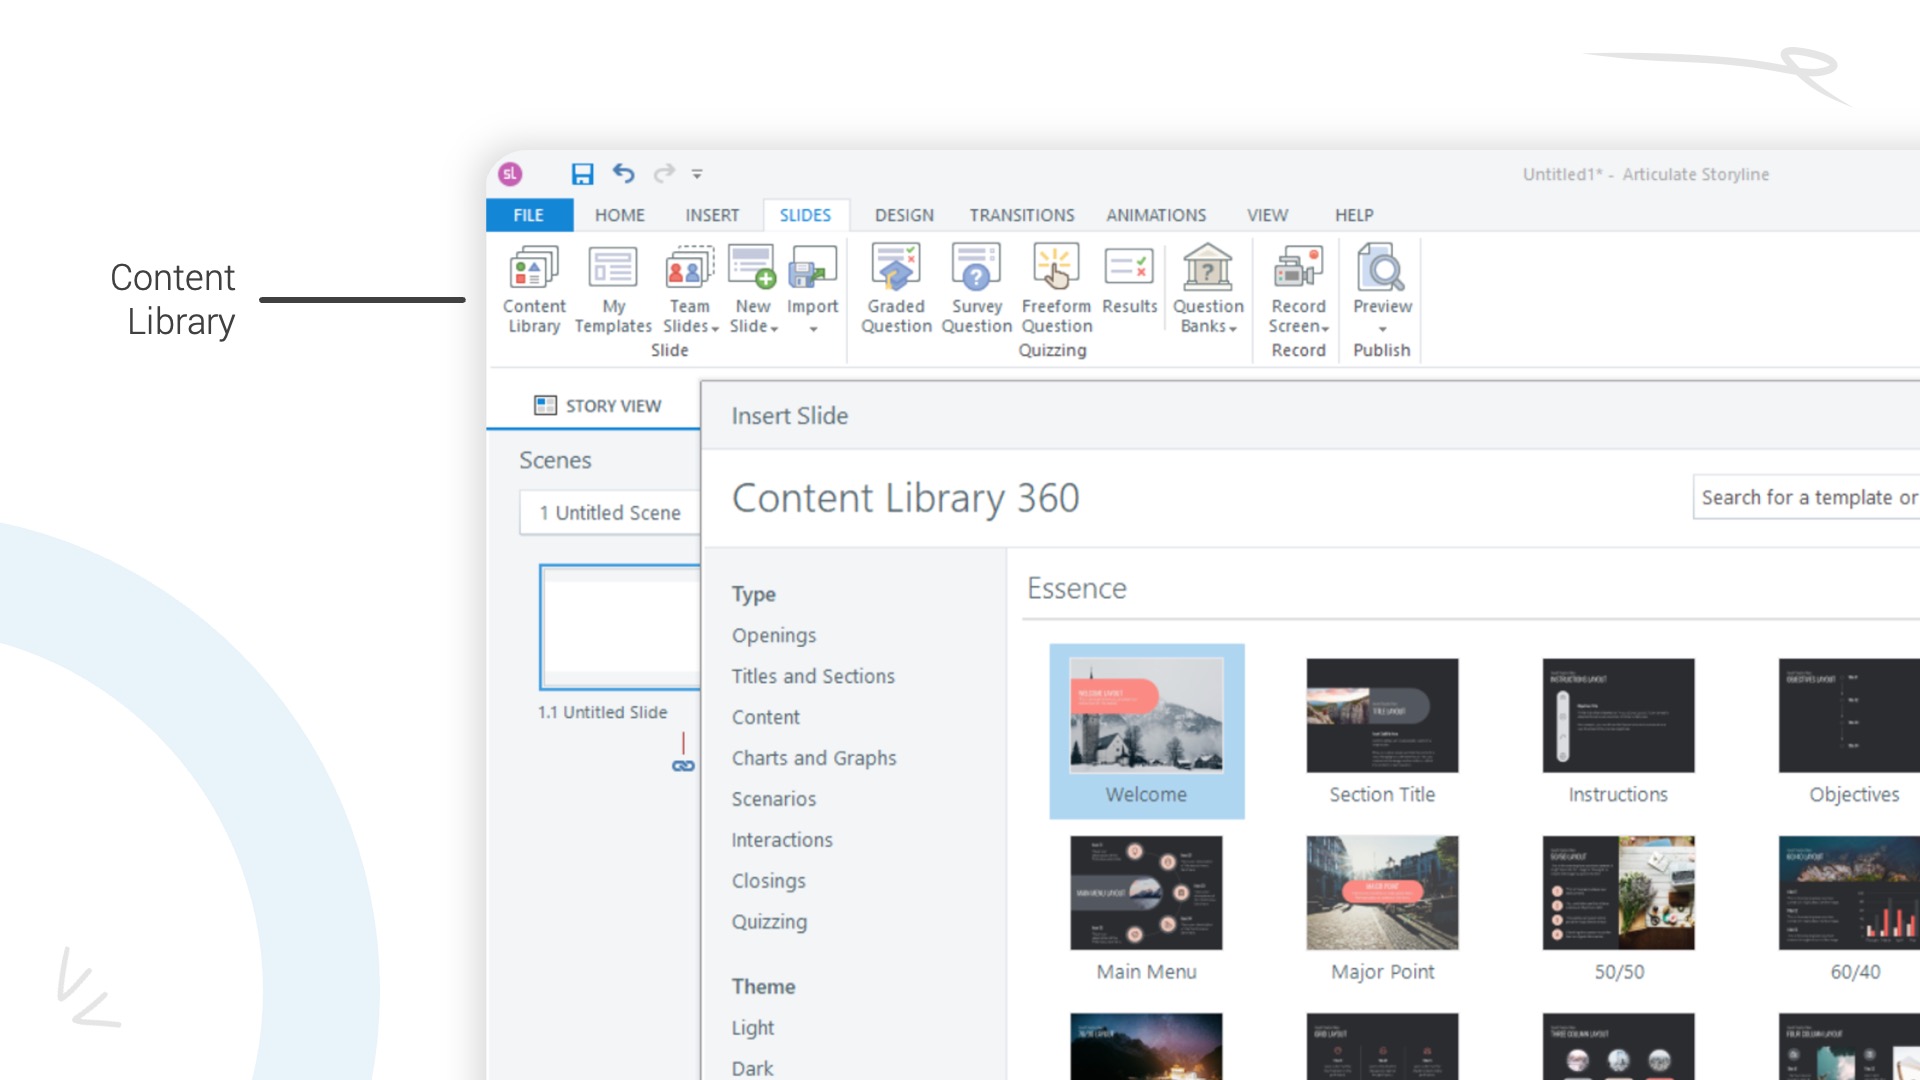
Finally, another option for creating slides is to select from one of the pre-built templates available as part of the Content Library. The Content Library contains hundreds of professionally-designed templates and layouts you can download and customize with your own content, images, etc.
When selecting a template from the Content Library, you can sort and filter the various templates by type, including static title and content slides, interaction slides, scenario slides, etc.
Next Steps for Learning How to Use Articulate Storyline
Alright! So, once you’ve created a new project in Storyline, what’s next? Well, at this point, this is when you’ll want to start learning how to create and edit content on your slides, how to work with audio and animations in the timeline, and how to create basic forms of interactivity with triggers and slide layers.
So, when you’re ready, check out these articles and videos to continue your learning:
How to Add & Edit Content in Articulate Storyline (coming soon)
The Bottom Line
Creating a new project in Articulate Storyline is pretty simple! However, making sure to adjust your slide size, save your project, and understand the different ways you can add slides will help you get your project off on the right foot!
So, what other tips or questions do you have about creating new projects in Storyline? Share them by commenting down below!