How to Navigate the Articulate Storyline Interface
When you’re new to or first learning how to use Articulate Storyline 360, it can be overwhelming to figure out where to begin. After all, Articulate Storyline is a complex eLearning authoring tool that allows you to design and develop a wide variety of asynchronous eLearning experiences that can include text, images, animations, videos, screen recordings, interactivity, branching scenarios, and much more.
But the truth is, Articulate Storyline doesn’t have to be as intimidating as it might seem the first time you open it! Yes, there’s a lot to learn when it comes to scenes vs. slides, triggers, slide layers, variables, and everything else, but once you understand how to navigate the general interface, you’ll soon discover that it’s actually quite similar to using Microsoft PowerPoint—if there was a version of PowerPoint that was pumped up on steroids.
So, in this article, I’ll walk you through how to navigate the Articulate Storyline interface.
Start Screen
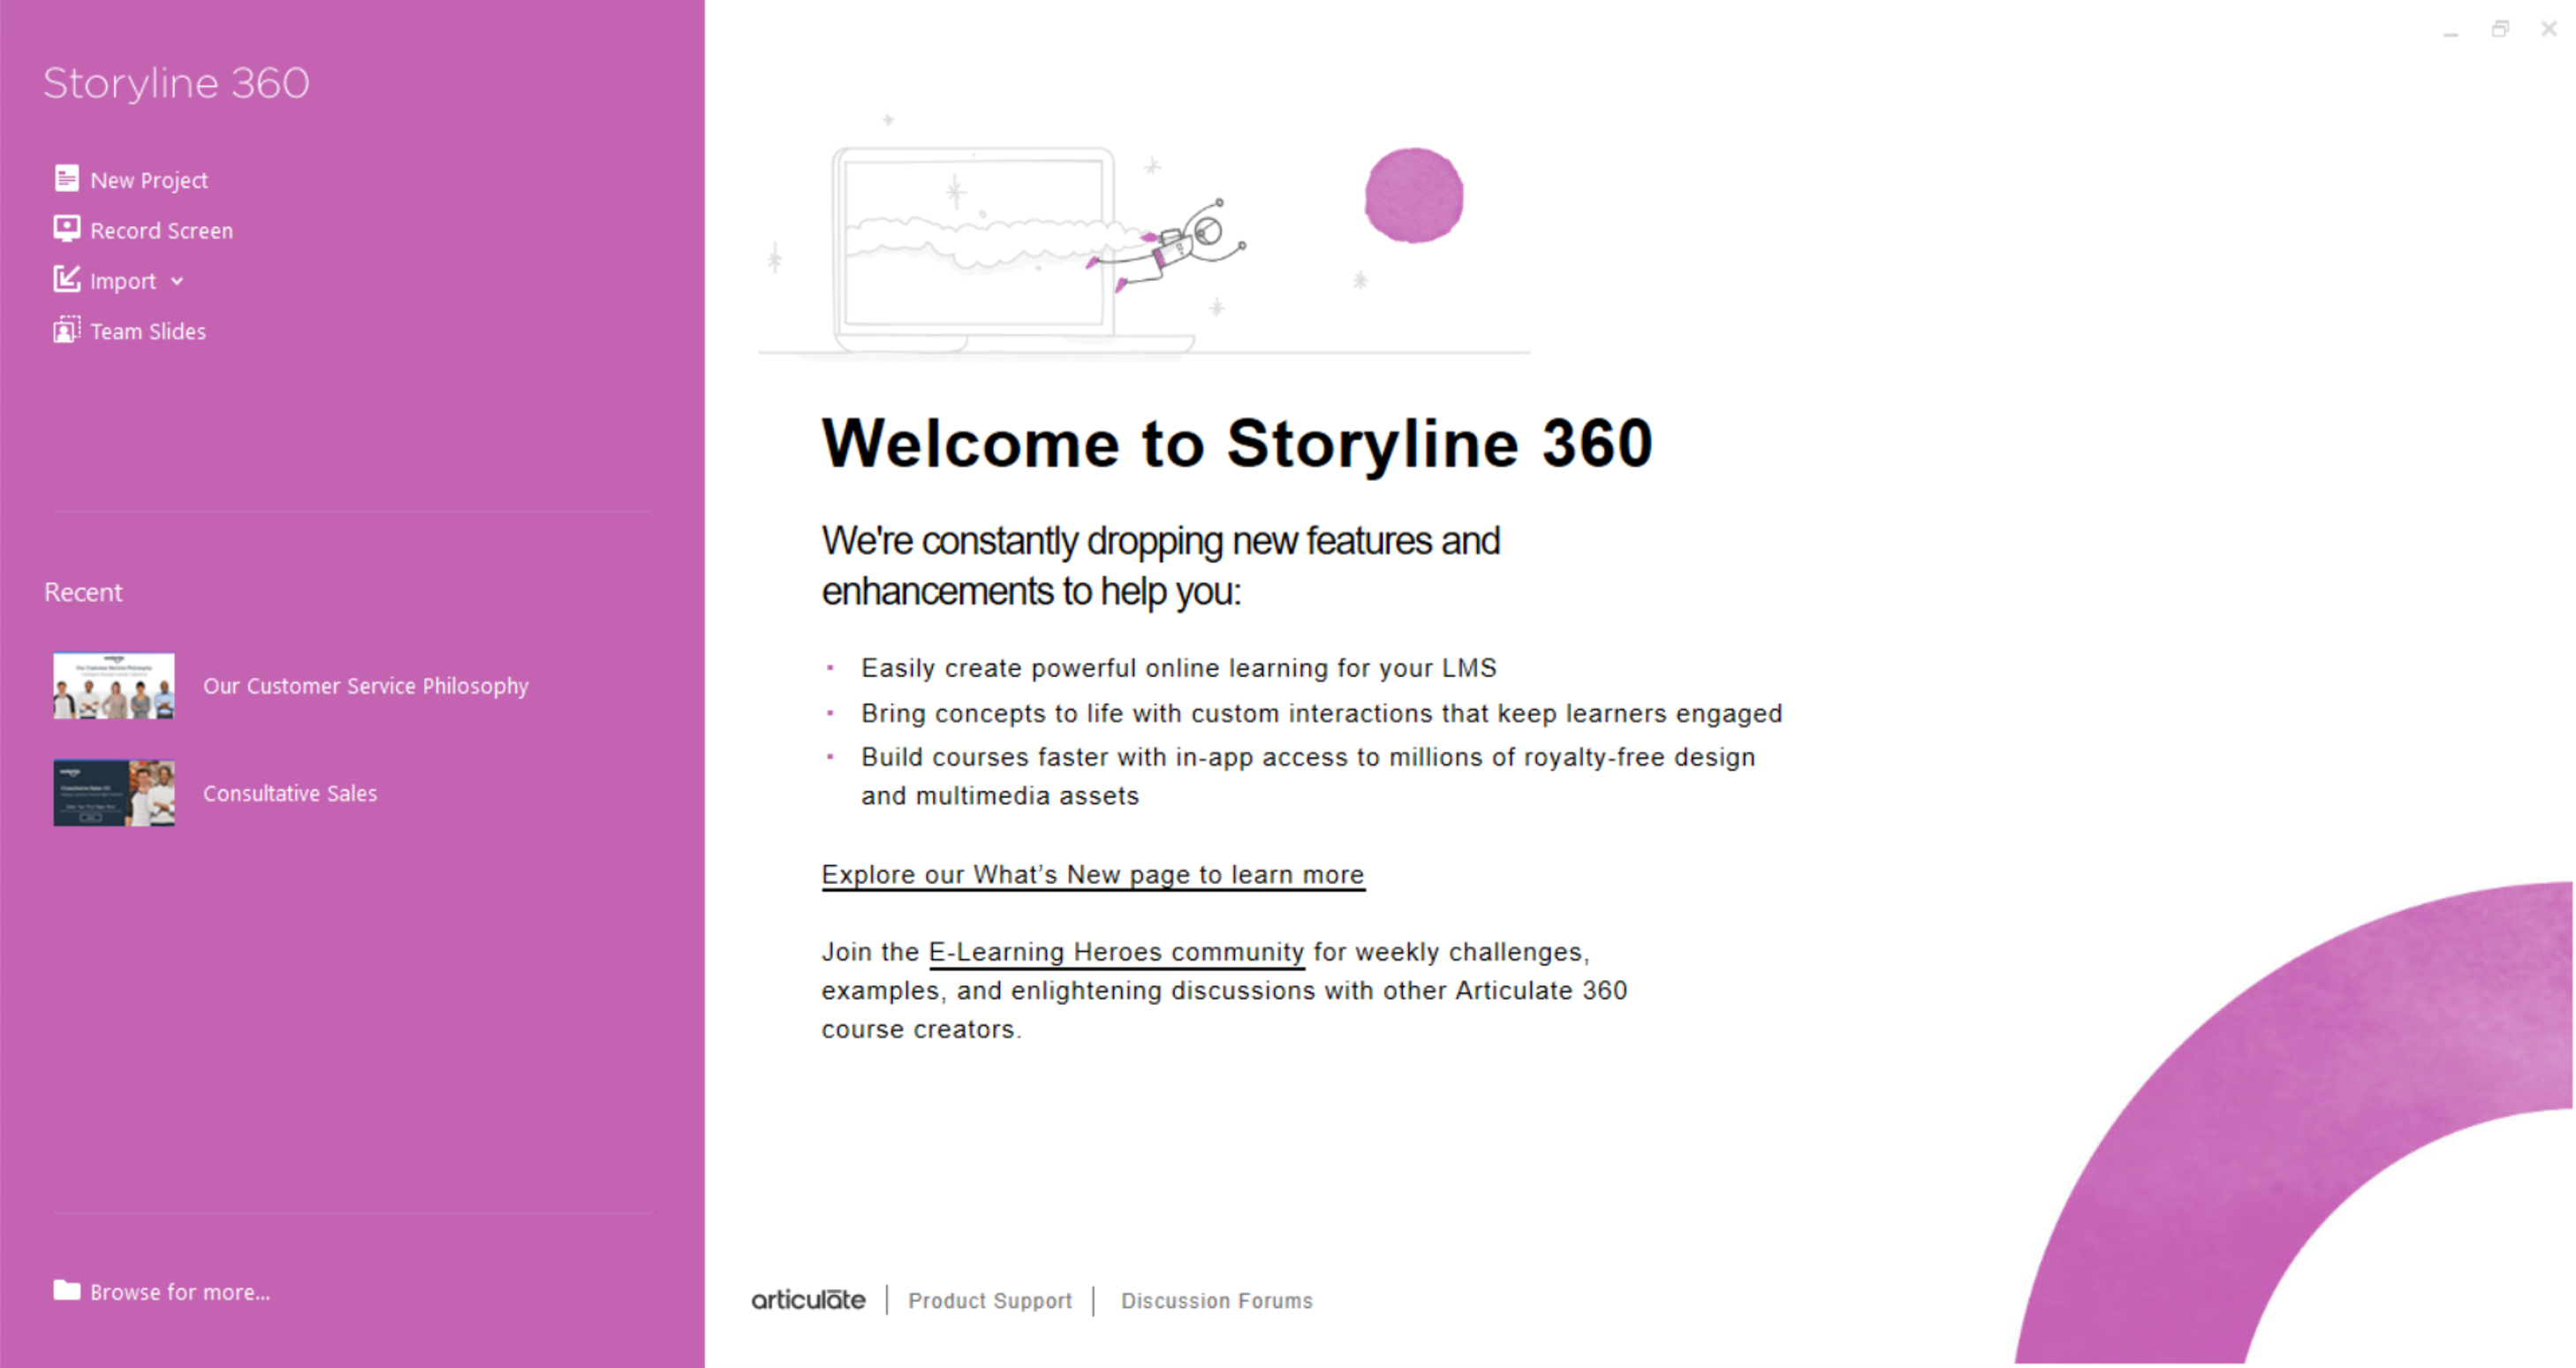
When you first launch Articulate Storyline 360, you’ll see the start screen. This is where you can start creating a new project from scratch or open a recent project.
New Project: Select this option when you want to create a blank project.
Record Screen: Select this option when you want to start a new project by creating a screen recording.
Import: Select this option when you want to start a new project by importing content (such as a PowerPoint deck).
Team Slides: Select this option when you want to start a new project by importing template slides from your Articulate 360 Teams account (only available to those working on an Articulate 360 Teams plan).
Story View
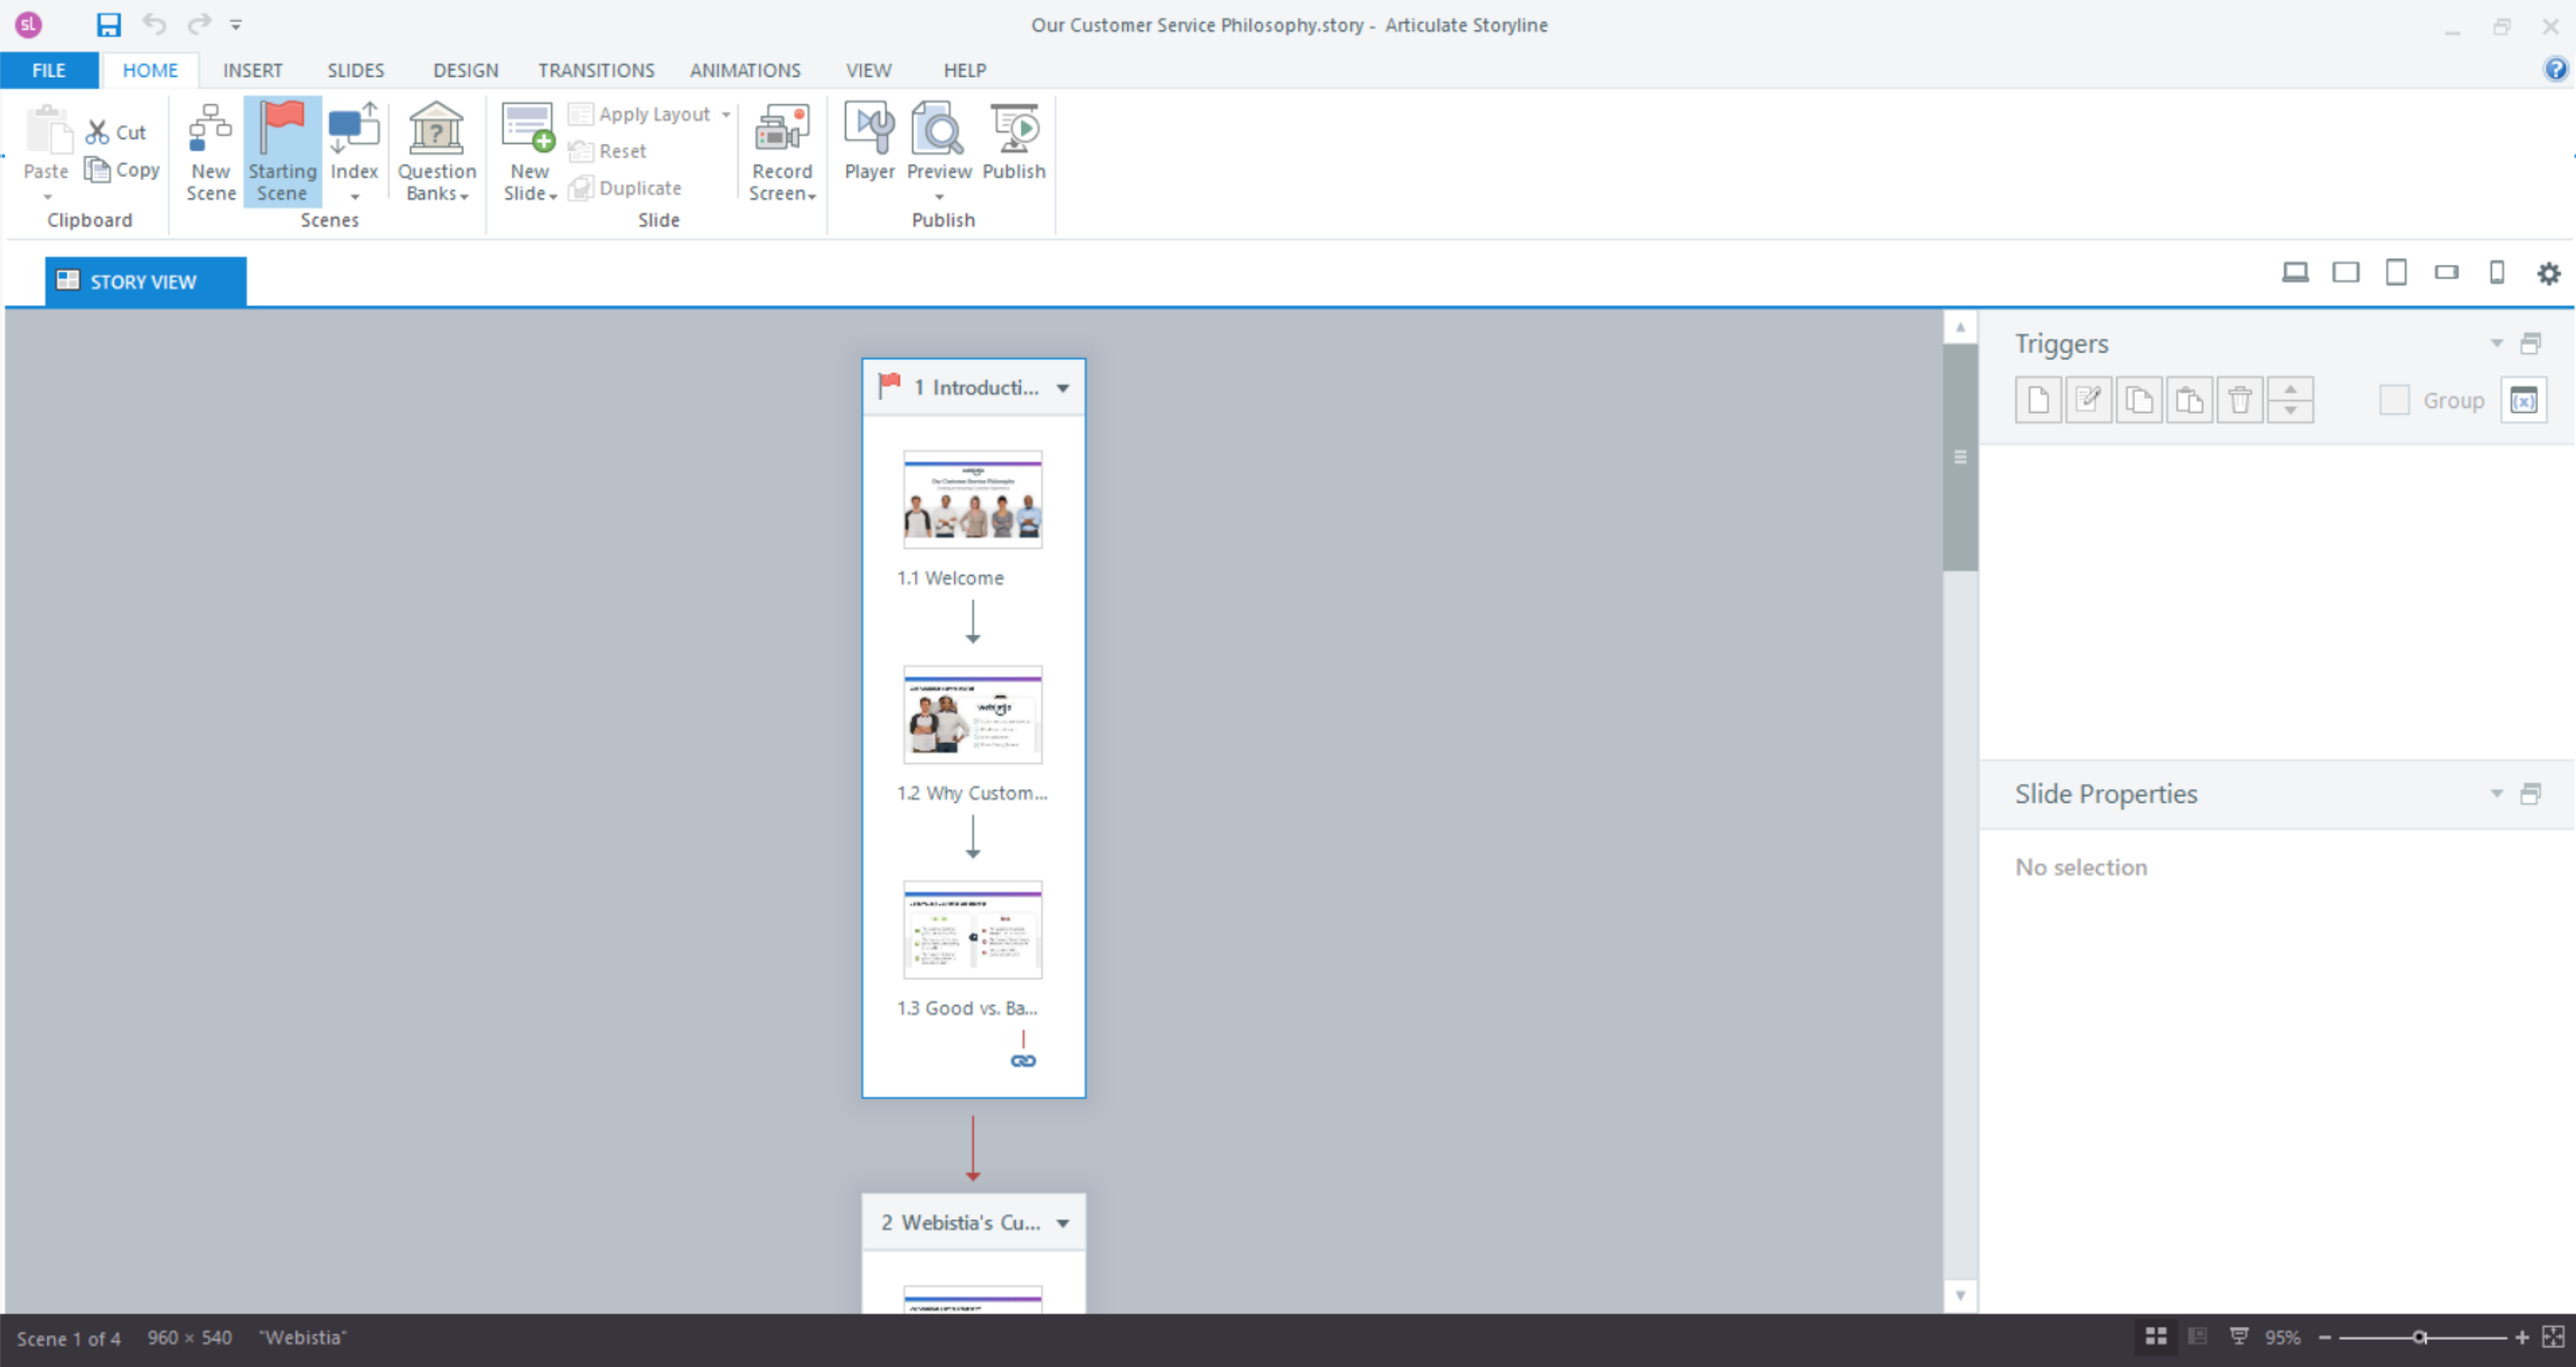
Once you launch a blank project in Articulate Storyline, the first thing you’ll see is Story View (sometimes referred to as Scene View). Story View provides you with a high-level overview of your entire project along with all of your project’s scenes and slides. Each slide is represented as a thumbnail, with each scene representing a group of slides.
Viewing your project in Story View is an easy way to navigate and jump around between the different slides you might want to edit. And, of course, when you’re ready to edit a specific slide, you can simply double-click it to enter Slide View.
Slide View
Slide View is where you can edit the individual slides within your Storyline project, and this is where things start to closely resemble PowerPoint. When in Slide View, you’ll see your slide at the center of your workspace with thumbnails of the other slides within the select scenes on the left.
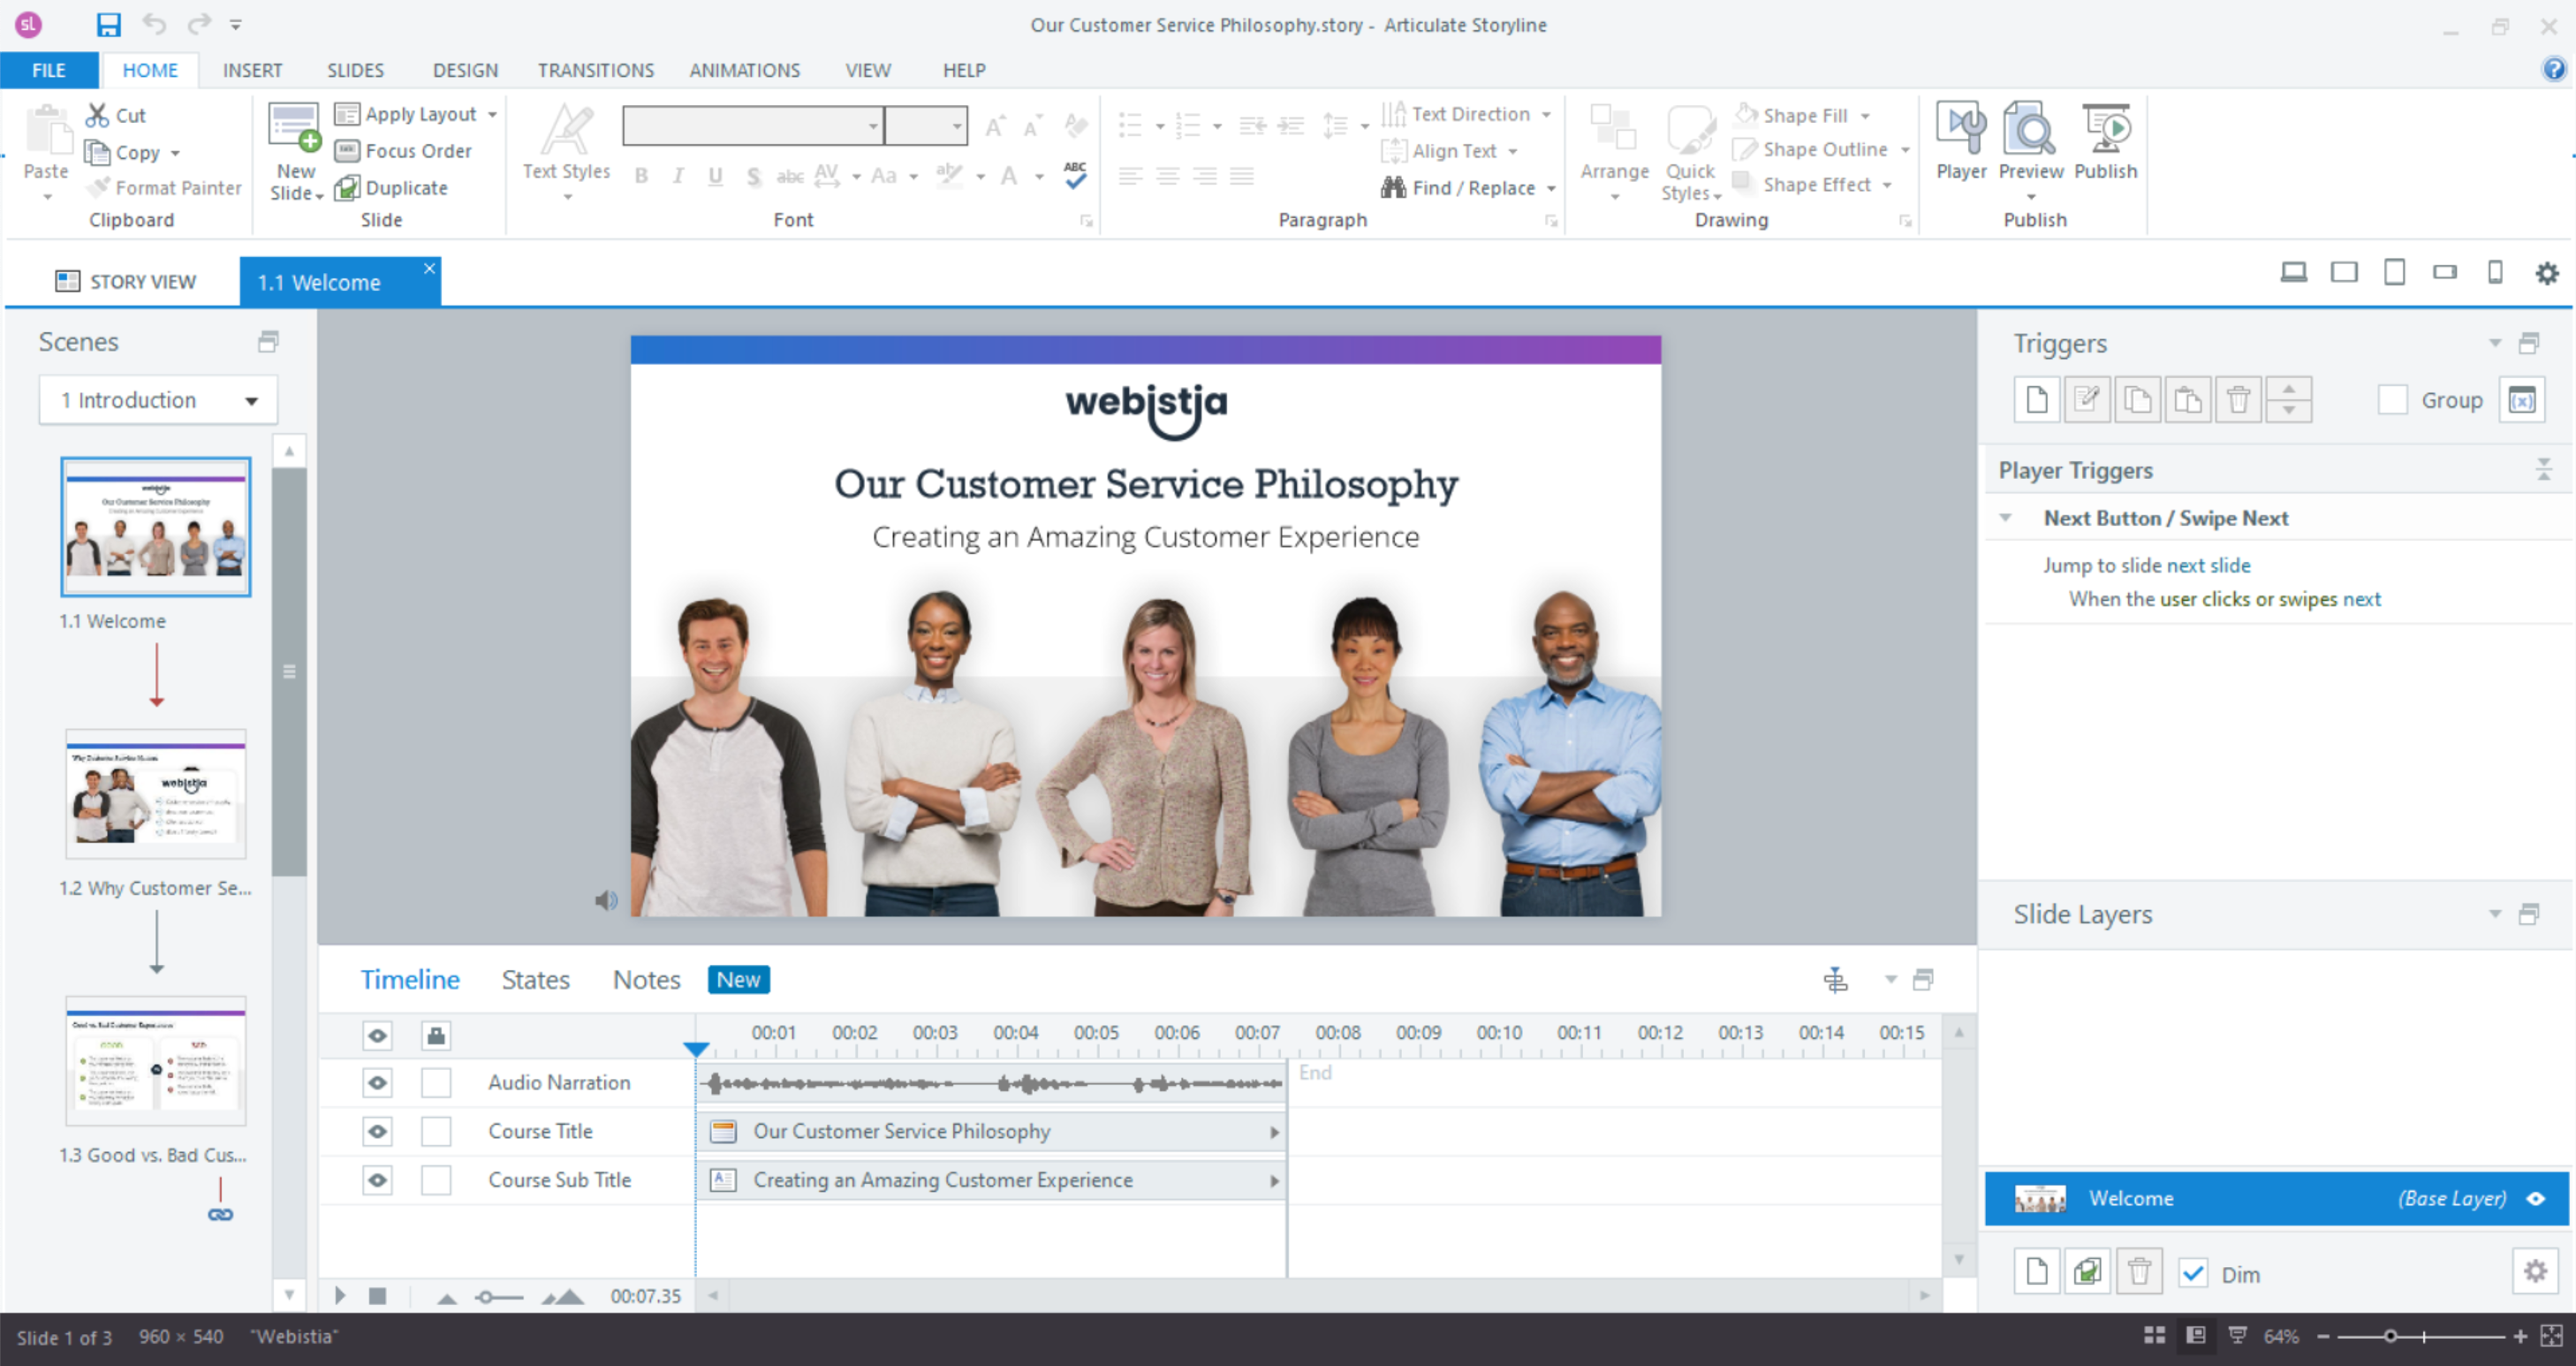
While editing a slide, you can also zoom in and out of your slide (just like in PowerPoint) to get a closer look at various objects on your slide or for more detailed editing.
Ctrl + Mouse Wheel: The most intuitive way to zoom in and out is to use the click wheel on your mouse. Simply hold down the Ctrl key and scroll with your mouse wheel to zoom in and out.
Pinch to Zoom: If you’re using a laptop and your computer supports it, you can also use a pinch-to-zoom gesture on your trackpad to zoom in and out.
Zoom Slider & Percentage: If you’d like more precise control over the zoom level of your slides, you can use the zoom slider or percentage control in the bottom right corner of the screen.
Fit Slide to Current Window: To the right of the zoom slider, you’ll see a small square icon with multiple arrows. Clicking this option will zoom your slide in or out to make it fit within the viewable area of your slide workspace.
Free Course: 10-Day Career Mindset Reset
Inside The eLearning Designer’s Academy, we think a little differently about professional development and career growth. Enroll in our free 10-Day Career Mindset Reset to start thinking differently about your skills, career, and confidence!
Ribbon
Across the top of the Articulate Storyline interface, you’ll see the ribbon. The ribbon operates almost identically to the ribbon you might see in Microsoft PowerPoint or other Microsoft applications. From the ribbon, you can access many different options to customize your slides, add new slides, and insert different types of multimedia.
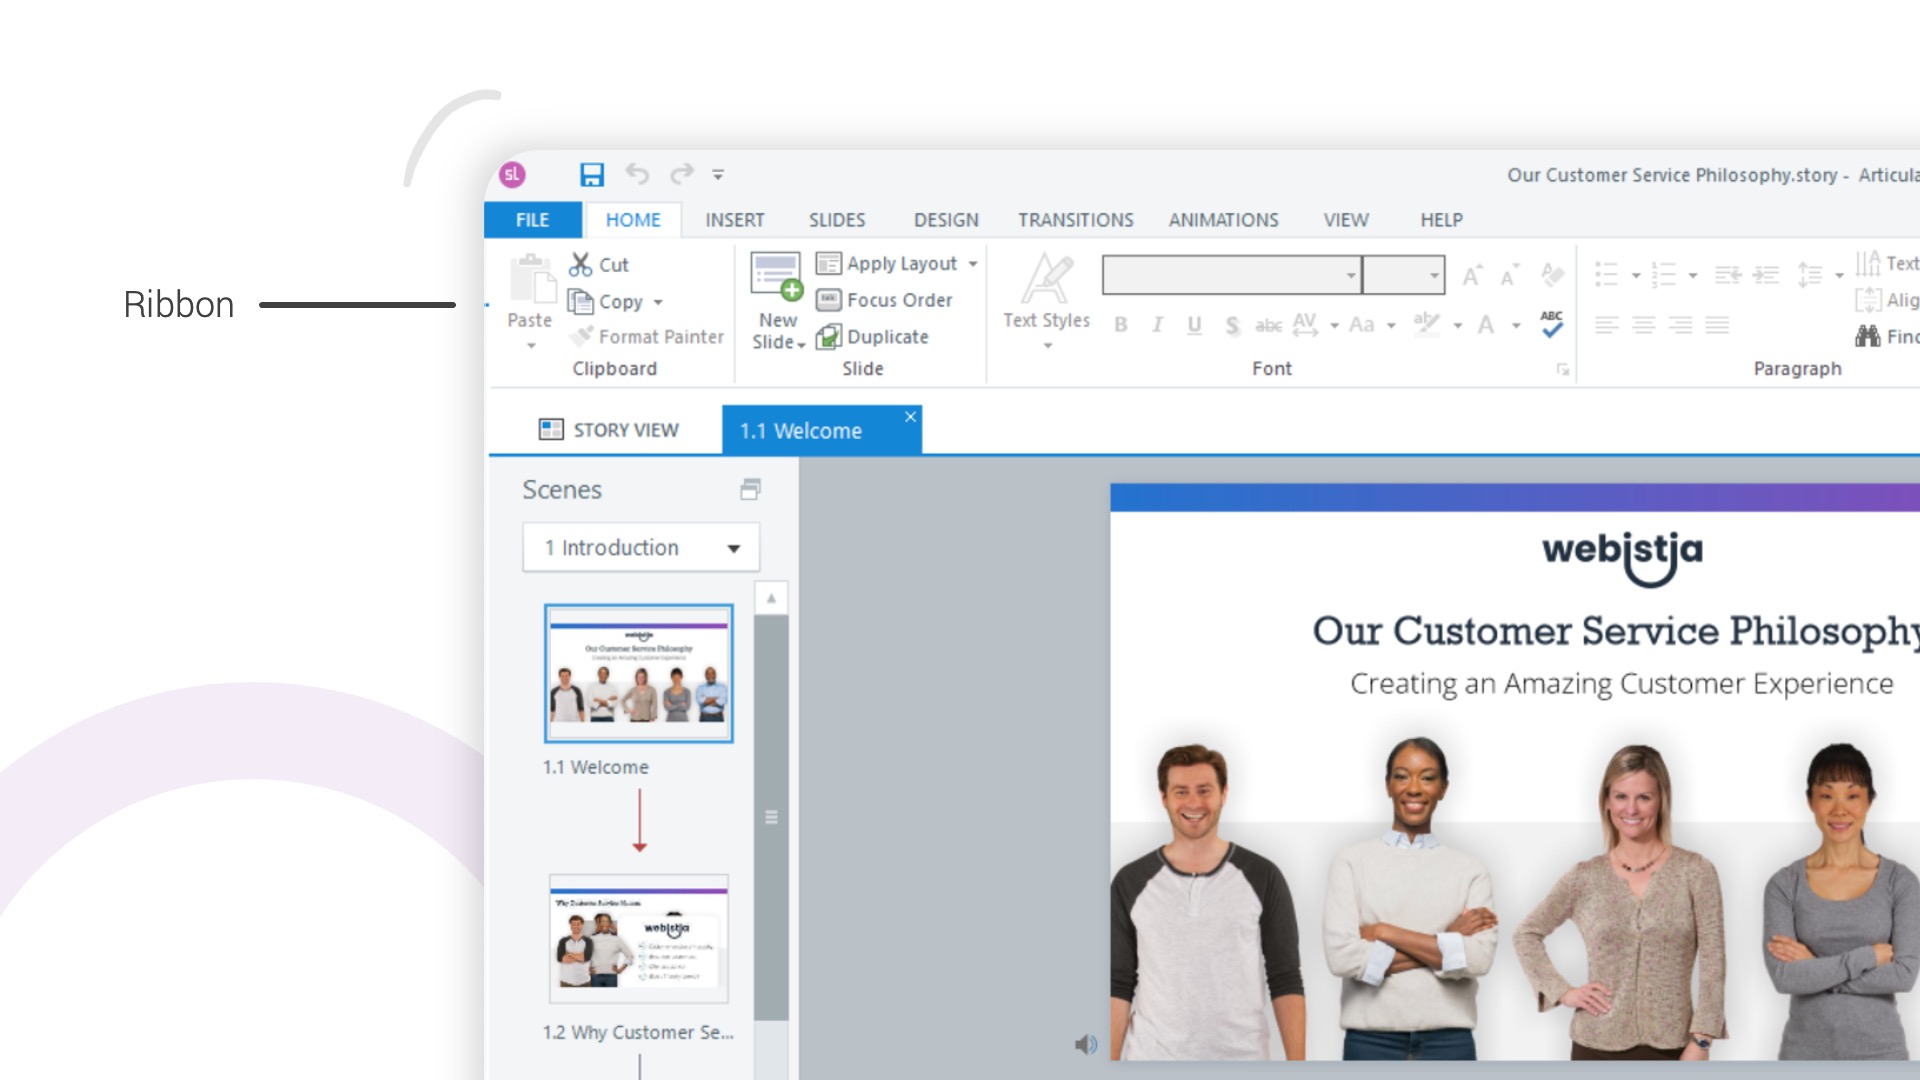
File Tab: Use the File tab when you want to create a new project, save your project, import slides, or work with translations.
Home Tab: Use the Home tab to adjust the formatting of text or other objects. The Home tab also provides quick access to add new slides, customize the player, preview your project, or publish your project.
Insert Tab: Use the Insert tab when you want to add different types of multimedia to your slides. From here, you can insert basic objects like shapes, pictures, videos, audio, text, etc. You can also insert various interactive objects like buttons, sliders, markers, etc. And finally, the Insert tab can be used to add multimedia from Content Library 360 like characters, stock photos, illustrations, and much more.
Slides Tab: Use the Slides tab to insert new slides into your project. From here, you can add blank slides, template slides, quiz slides, etc.
Design Tab: Use the Design tab to adjust your slide size or make changes to the pre-defined color and font themes.
Transitions Tab: Use the Transitions tab when you want to add a transition animation between slides or slide layers (similar to PowerPoint).
Animations Tab: Use the Animations tab to add entrance and exit animations to individual objects on your slides. From here, you can also add motion paths and emphasis animations to your slide objects.
View Tab: Use the View tab to access and edit your Slide Masters, along with toggling different options on and off to view grids and guides on your slide. From here, you can also access the Media Library to view and manage all of your project assets.
Help Tab: Use the Help tab to access various help articles and tutorials.
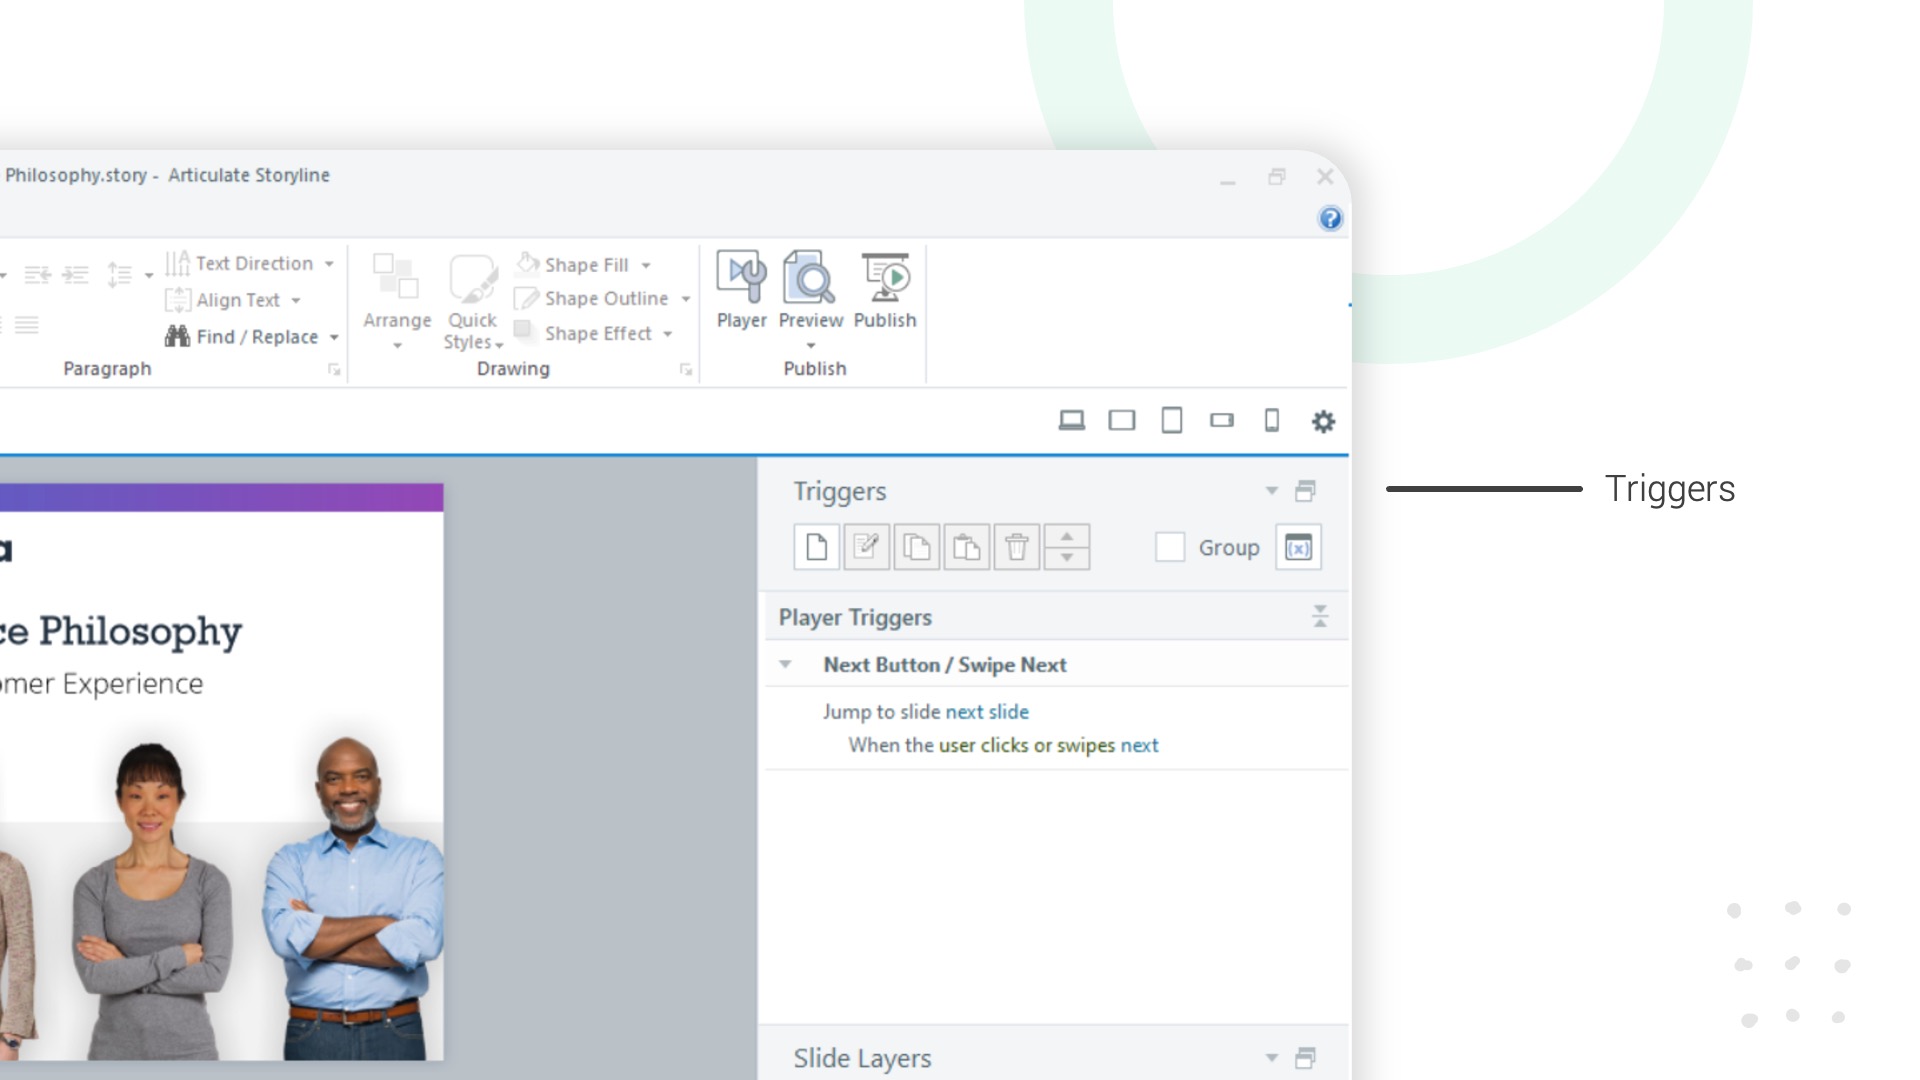
Triggers Panel
On the right-hand side of the screen, you’ll find the Triggers panel. Triggers are what allow you to “write” instructions for what you want Storyline to do, and they are the foundation for creating interactive content without having to actually write code. Triggers are slide-specific, which means each slide and slide layer gets its own unique set of triggers depending on the types of experiences you’re creating.
From the Triggers panel, you can also access the Variables window, where you can create and manage custom and built-in variables for advanced interactivity.
Slide Layers Panel
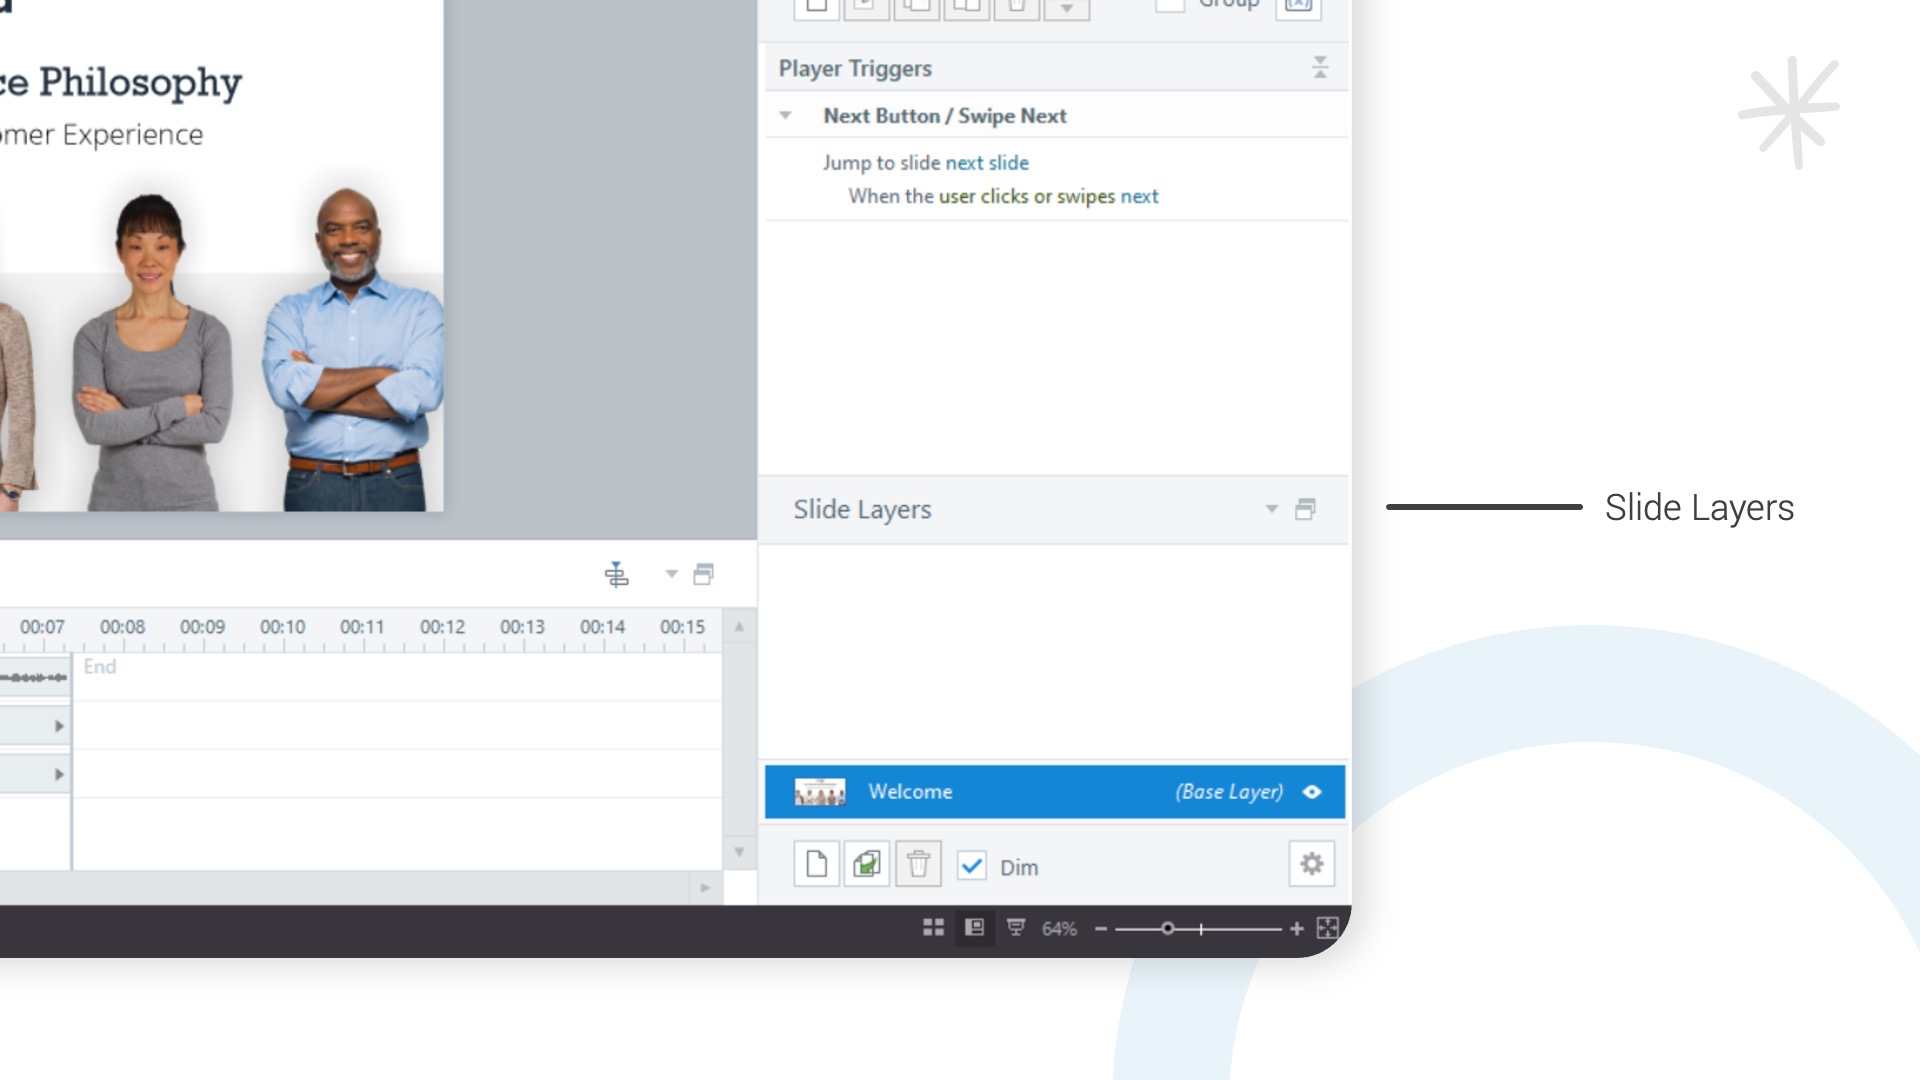
Below the Triggers panel, you’ll see the Slide Layers panel. Slide layers allow you to selectively hide and reveal different content on your slides. Typically, slide layers are used to create interactive content (like pop-up windows or quiz feedback) which is displayed when the learner takes some sort of action. One way to think of slide layers is like stacking multiple slides on top of one another.
From the Slide Layers panel, you can also click on the gear icon in the bottom-right corner to access the Slide & Layer Properties window.
Timeline, States & Notes Panel
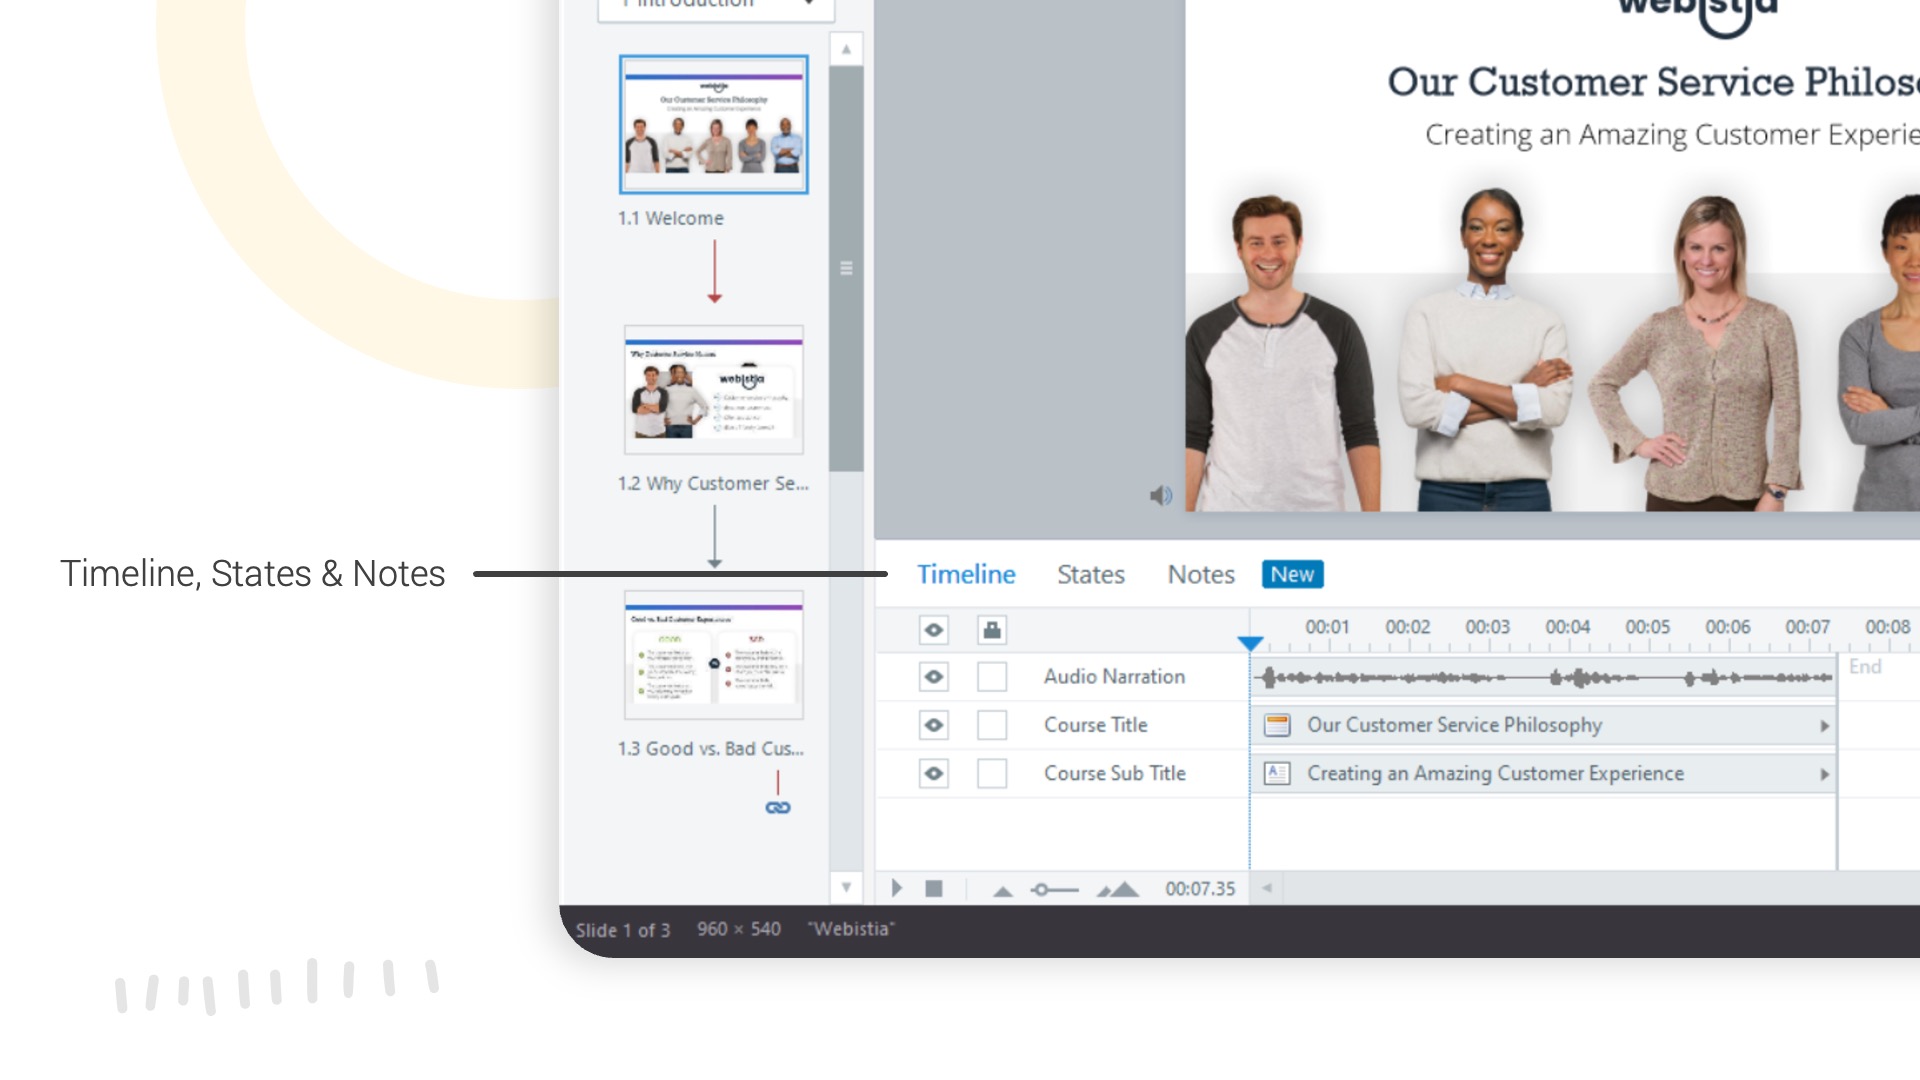
Across the bottom of the screen, you’ll find the Timeline, States, and Notes Panels. The Timeline is used to provide a visual representation of each object on your slide along with their stacking orders and timing for when they will enter or exit off the screen area. Typically, the timeline is used when creating animated content synced with audio narration.
Next, the States panel is used to create and edit the states of buttons and other objects. Typically, states are used to create interactive buttons that change their appearance depending on how the user interacts with them (e.g., the hover state when the user mouses over a button).
And finally, the Notes panel provides a space to add text content which can be presented to the learner in the player. Typically, the Notes panel is used to provide a transcript of audio narration, but it can also be used for providing written instructions and supplemental information on a slide-by-slide basis.
How to Undock & Redock Panels
When working in Articulate Storyline, if you’re using multiple monitors, you can undock any of the panels by clicking on the Undock / Redock icon located in the upper right of any panel window. For example, if you’re working on a slide with a complex timeline, you can undock the timeline panel and move it to a second window for a larger view.
When you’re done, you can simply click the same icon to redock the panel back to its original location. And, of course, if you undock multiple panels, you can redock them all at the same time by going to the View tab in the ribbon and clicking the Redock All Windows button.
Next Steps for Learning How to Use Articulate Storyline
Okie dokie! Once you have a basic understanding of how to navigate the Articulate Storyline interface, you’re now ready to start creating your first project! Check out these articles and videos to continue your learning:
The Bottom Line
Learning how to use and navigate Articulate Storyline doesn’t have to be as intimidating as it might seem! Just remember, if you already know how to do it in PowerPoint, then you likely already know how to do it in Articulate Storyline.
So, what other tips or questions do you have about navigating the Articulate Storyline interface? Share them by commenting down below!